We disassemble the iPhone 3g/3gs ourselves
iPhone 3gs - this old man was released back in 2009 and still continues to delight its users. But its visual condition may already be far from ideal. Over time, the back plastic cover could become quite frayed, and worse, cracks could appear. This is one of the main problems of the iPhone 3gs.
The screen could become completely unreadable due to the abundance of scratches. The Home and Power keys and volume rockers may also stop working. In order to give your device a new look or replace faulty components, you can disassemble your smartphone. Whether you do it yourself or take it to a service center is up to you.
As for me, it’s better to disassemble and change everything yourself than to pay someone else for it. Moreover, it is not difficult to disassemble an iPhone. This article will teach you how to disassemble iPhone 3g/3gs with ease. First of all, you need to acquire a special set of tools for disassembling iPhone 3g/3gs.
Professional tool set
In particular, we will need a suction cup, without which it will be extremely difficult to disassemble the phone. Plastic spatulas are also very useful, they help to snap off the cables without causing any damage, and screwdrivers with specific slots will also serve us well. In general, the set is not very expensive, but it will always come in handy around the house.
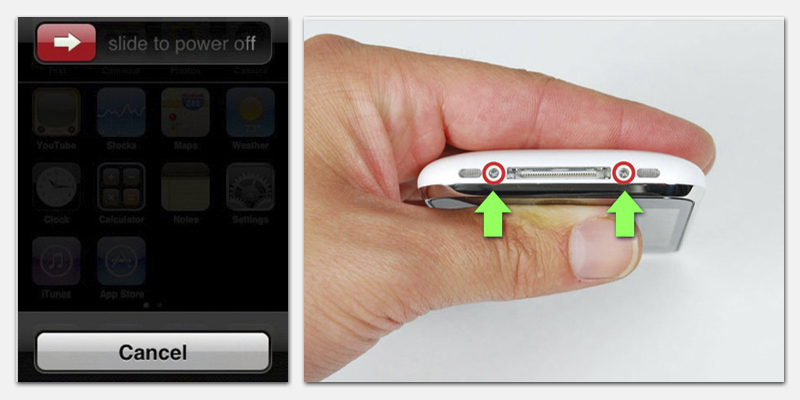
Well, let's proceed directly to disassembly and turn off the gadget. We start by unscrewing 2 screws on the bottom end of the iPhone.
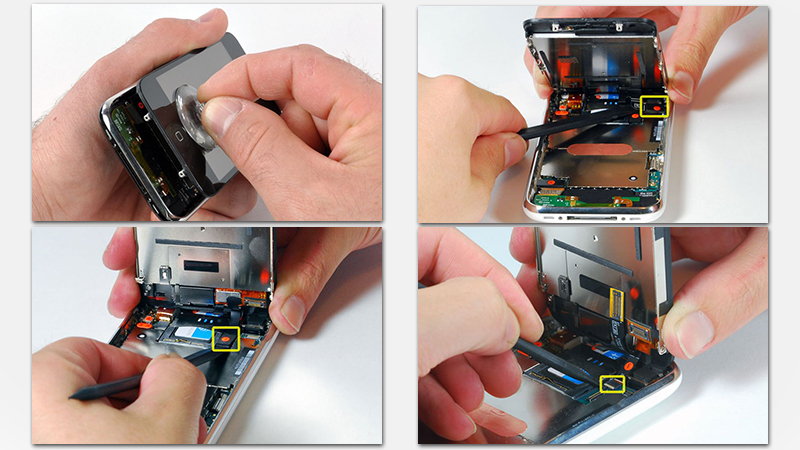
Then, using a suction cup, carefully pry up the screen unit. The cable from the system board will not allow you to completely disconnect it. Separate it with a plastic spatula. After that, disconnect the touchscreen cable and the speaker cable.
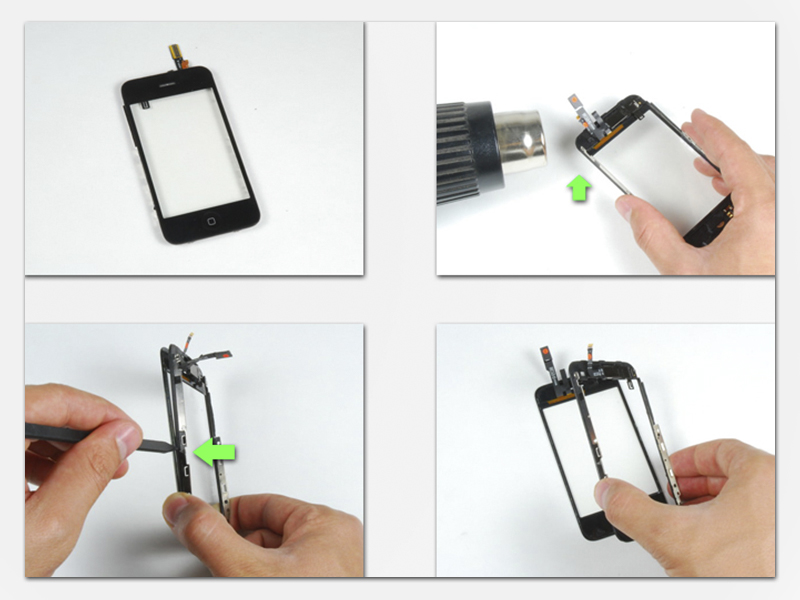
Now you can completely detach the screen unit. If the problem was in the touch glass or display, then you need to disassemble this unit. Unscrew the screws from the base of the block...
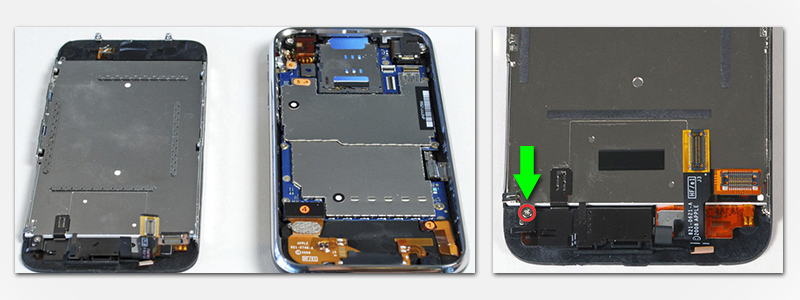 Then, unscrew the screws around the perimeter of the frame. Next, we separate the display from the frame with the protective glass.
In order to free the glass from the remaining structure, it is necessary to heat the iPhone glass from the end with a hairdryer, since it is held on by glue. Next, pry up the glass with a plastic spatula and disconnect it along the entire perimeter.
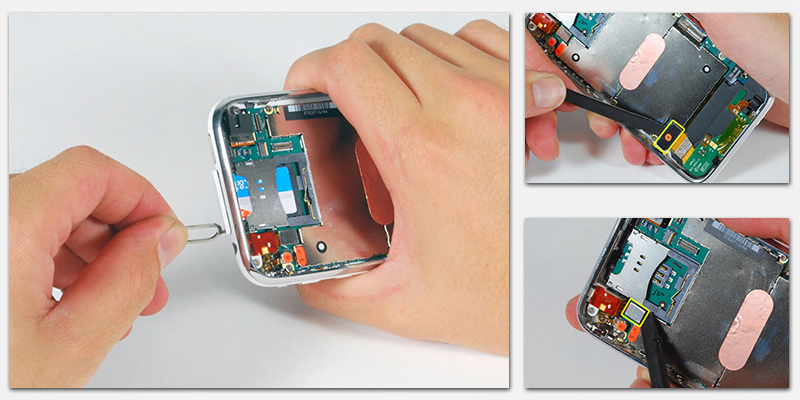
Now you can replace the protective glass and display. If the problem was in the battery or another part of the case, we continue disassembling. Remove the SIM card tray. Disconnect the module cable at the bottom of the smartphone from the motherboard. At the top we disconnect the Audio connector cable.
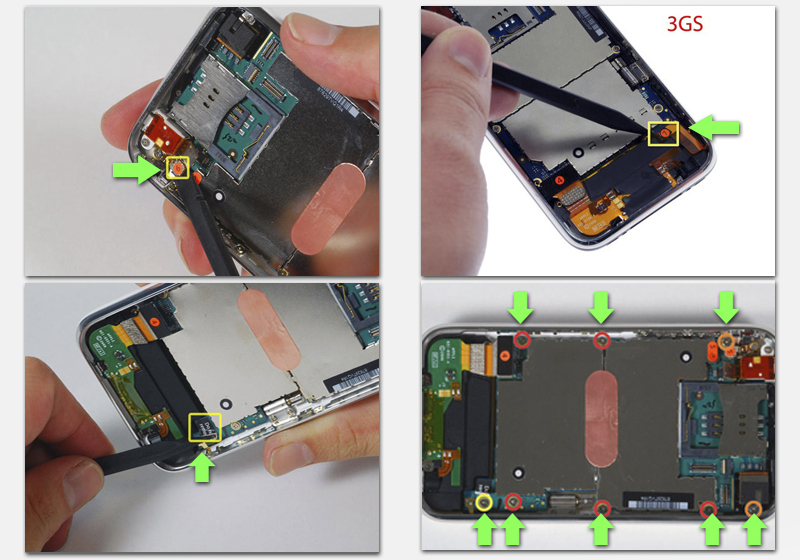
After that, disconnect the connector marked with the number six. For iPhone 3gs, we disable one more cable, it is marked with the number seven (it is not present in 3g). Next, remove the sticker. Next, unscrew the eight screws. The main thing is to remember in what order they go! Since they are all different lengths.
We disconnect the camera module, but not completely, since the cable that is attached to the body has a non-removable fastener. Now we pry up the motherboard with a plastic spatula and take it out.
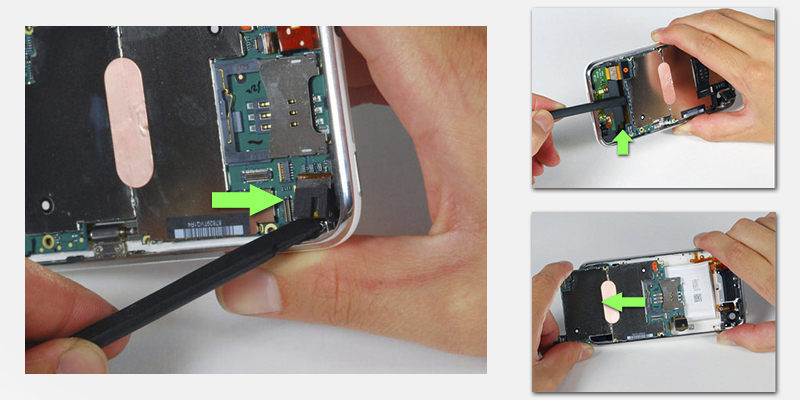
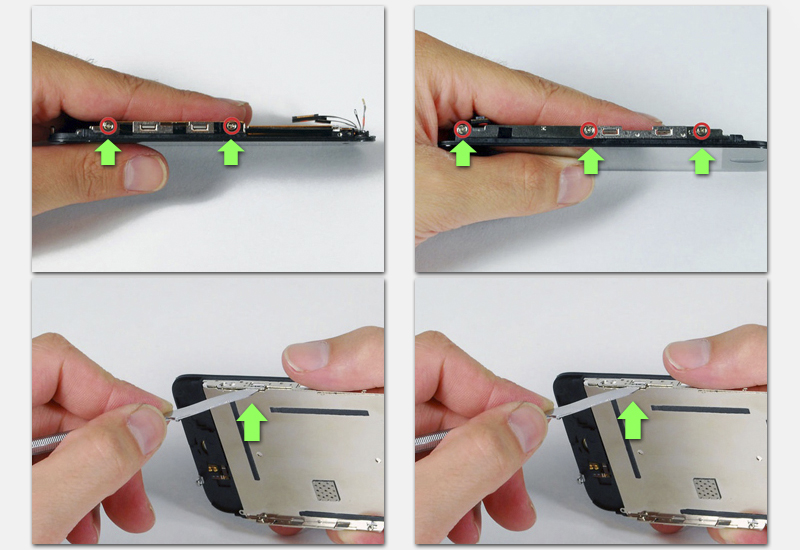
Access to the battery is open. We take it out using a plastic spatula. If you need to change the back cover of the iPhone 3gs, then continue dismantling. Unscrew the screws securing the power button and audio jack.