Instructions: how to create an Apple ID on iPhone (account)
Creating an Apple account by many users of Apple products is still considered a difficult task, accessible only to advanced geeks. Moreover, there is a very common misconception among people that this requires a credit card, which, according to some alarmists, can lead to the fact that your hard-earned money can disappear without any trace.
Needless to say, none of these statements are true. Firstly, creating an account will require no more knowledge from you than turning on your favorite gadget itself. Secondly, having a bank credit card is indeed highly desirable, but (an important note) is not at all a prerequisite. Thirdly, being afraid to pay with the same Visa or MasterCard is the same as nursing and nurturing your own phobias - there is nothing dangerous in that! Therefore, if you want to join civilization and use your iPhone to the maximum, it’s time to forget about fears and start creating an Apple ID. Believe me, it's so simple that you won't even have time to drink your morning coffee.
To do this, you will need a computer (Windows or Mac OS - it doesn’t matter), an active Internet connection, the iTunes program itself (preferably the latest version) and a working mailbox. The action algorithm is as follows:
- Launch iTunes, select “iTunes Store” and click “Sign in”.
- Click on the “Create Apple ID” button.
- In the window that appears, we confirm our intention by clicking the “Continue” button.
- We carefully read the user agreement (official version) or simply check the box next to the line “I agree” (all normal people do this).
- We must be patient, since we will have to enter a large amount of personal information (and spend, oh horror, a whole 5-10 minutes), after which we click “Continue”.
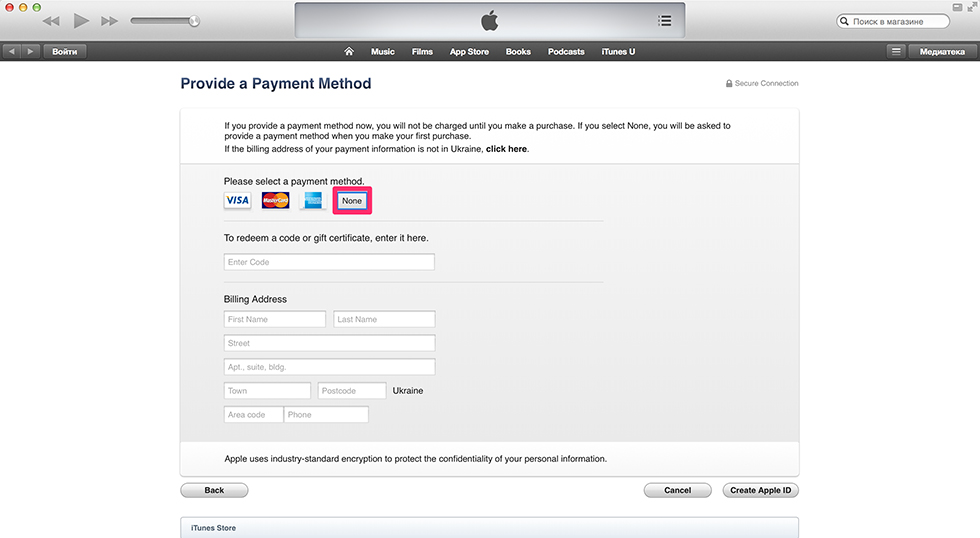
- In the next window, enter your credit (or debit) card information and your physical address. Important note: iTunes will check your geographic location, so if you indicate that you live in the Russian Federation, then the card must be issued by a Russian bank (however, no one has yet banned IP address spoofing programs).
- Let’s make the final arrangements: click the “Create Apple ID” button, after which you will be sent an email confirming your registration to the email address you specified during registration. It will contain a link, following which you will become the owner of an Apple account.
We use the built-in capabilities of the gadget (iPhone, iPod Touch, iPad)
Via the setup menu
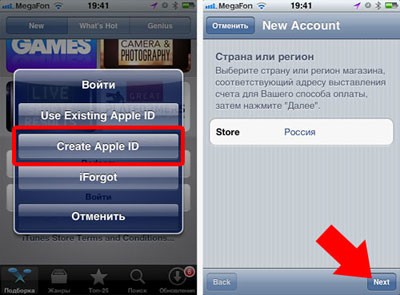
- On the gadget, go through the menu “Settings”, “iTunes Store”, “AppStore” and click “Create a new Apple ID”.
- Select the country and tap “Next”.
- We confirm the user agreement (tap “Agree”).
- Enter the required registration information.
- Enter your credit (debit) card information. Points 4 and 5 are similar to what is described in the previous block.
Via the App Store app
Registration without a credit card (this requires an Apple device)
The idea is that an Apple account acts as a kind of bonus when purchasing any game or application in the App Store.
Important Notes
- If you have English versions of the software installed, use Google Translator.
- You should not register a new Apple ID from public Internet cafes. It is unlikely that anyone will steal your data, but God protects the safe.
- If you do not receive an email confirming your registration within a few minutes, make sure that this is not due to the antispam filter.