Movavi Video Converter – is it really as good as they say?
If we need to convert video from one format to another and at the same time be able to edit it, there is Movavi Video Converter for this.
In this case, editing capabilities mean rotation, reflection, cropping, adding an inscription, a watermark, color correction, stabilization, and overlaying an audio track.
It is also possible to stabilize existing sound.
In principle, for a non-professional in the field of installation, this set should be enough. There is no need to think about anything more.
It is important to note that the Movavi converter is a paid program and at the moment (July 2016) it costs about 400 rubles. But a 7-day trial period is available for everyone.
But this program has a huge number of advantages and capabilities compared to other similar programs designed for video conversion and editing.
We will consider all of them during the description of using the Movavi converter.
A few words about installation
You will have to download a trial version from the official website, and then buy a full-fledged converter through the program window or on the website itself.
The installation here is quite standard, but unnecessary Yandex elements are also installed along with the main program. It's best not to install them.
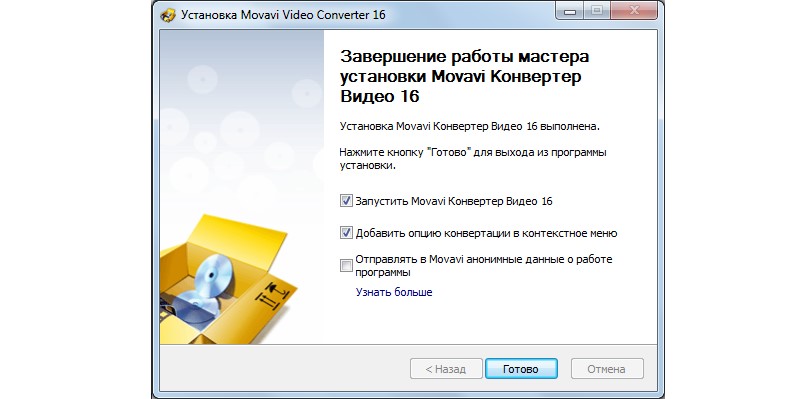
To do this, at the stage shown in Figure 1, you need to select the “Settings parameters” item and uncheck the boxes related to Yandex elements.
Nothing else that is not needed when using the converter itself is not installed here.
After installation is complete, you can select the option to add the conversion option to the context menu.
This means that when you right-click on a particular video file, one of the options will be conversion using Movavi.
When you select this context menu item, the program will open and the conversion process will begin.
This, by the way, is one of the rather significant advantages of this program.
This simple option allows you not to open the program and not use all the instructions for use.
You just need to right-click on the desired video and select the desired menu item.
About use
Let's say right away that the Movavi video file converter accepts almost all possible video and audio file formats that can be on your computer.
To convert a particular file using this program, you must do the following:
- Launch the Movavi converter.
- Drag the source file into the program window. This can be done using a set of commands located on the top panel of the program or by simply dragging a file from a folder into the appropriate field with the mouse cursor.
The top bar commands include buttons such as “Add Video,” “Add Audio,” and “Add Image.” They are intended for installation.
There you can also find the “Add DVD” command.
It is designed so that the user can specify the path to the disk inserted into the drive, and the program can take all possible files from it, one of which the user will edit.
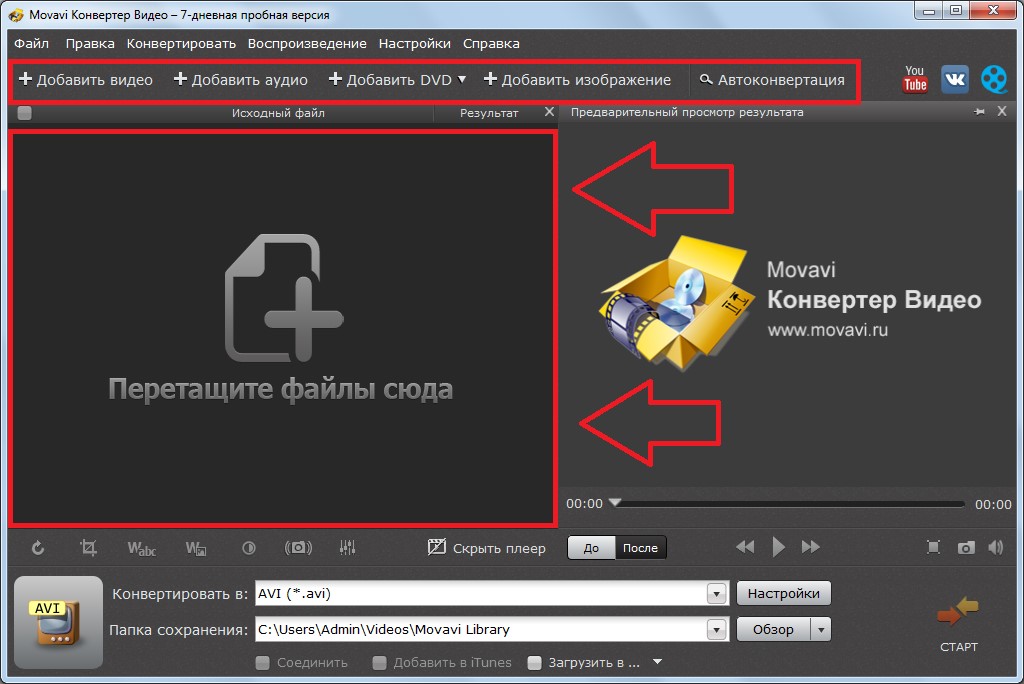
- After the source file is inserted into the program using one of the methods described above, you can convert it or start editing it. You can insert several files at once, and then click on one of them. After this, all actions will become active.
To convert a file, you need to select the format into which the file will be converted and the folder where it will be saved at the bottom of the program window.
All this is done very simply and quickly.
So the format can be selected from the drop-down list, which opens by clicking the button highlighted in green in Figure No. 4.
And the save folder can be selected by clicking on the “Browse” button.
After this, a standard selection dialog will open, where the user specifies the desired folder.
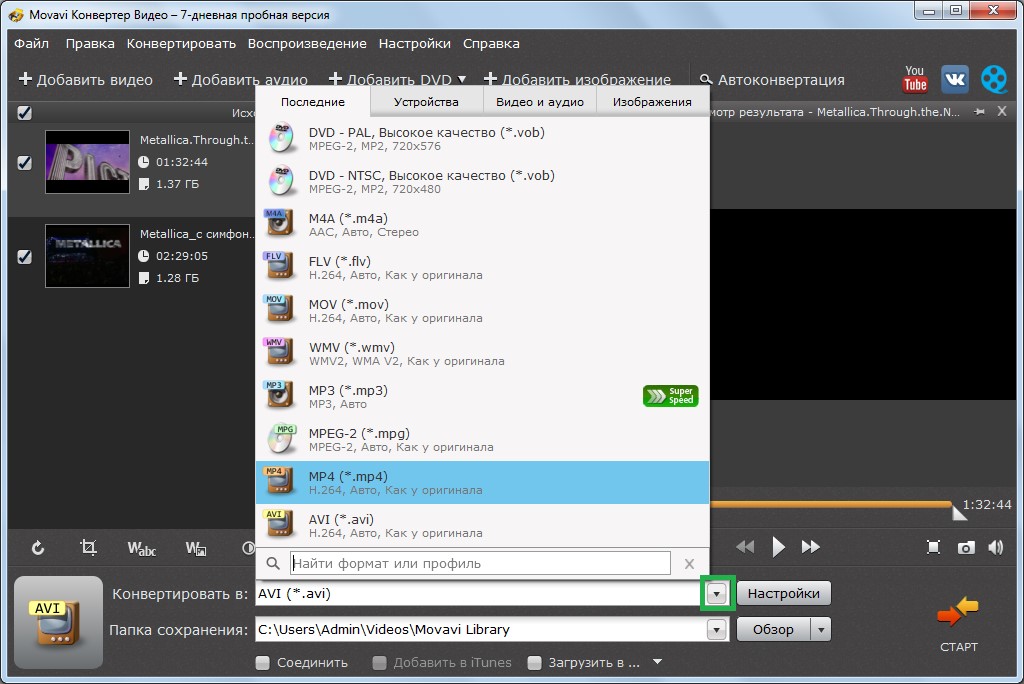
As you can see, the format selection window here is very convenient. It has tabs “Latest”, “Devices”, “Video and Audio”, “Images”.
The first tab shows the most recently used formats.
The "Devices" tab shows a list of a wide variety of devices, including iPhone, Xbox, PlayStation and much more.
The program itself will determine which format is suitable for a particular device. The remaining two tabs are for directly selecting the format.
- After the above parameters have been determined, all that remains is to simply click the “Start” button in the lower right corner of the program and wait for the end of the conversion. After this, you can open the folder specified earlier for saving and use the converted file there.
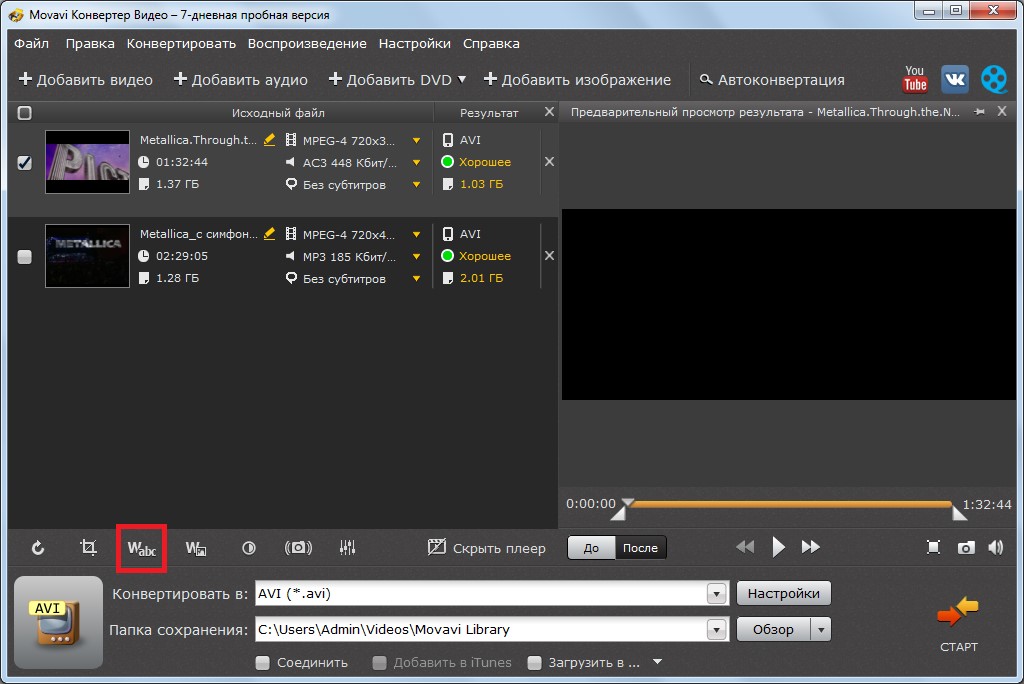
- To do a little editing, you need to select the desired file from the list and select the appropriate command on the panel, highlighted in Figure 5 with a green frame.
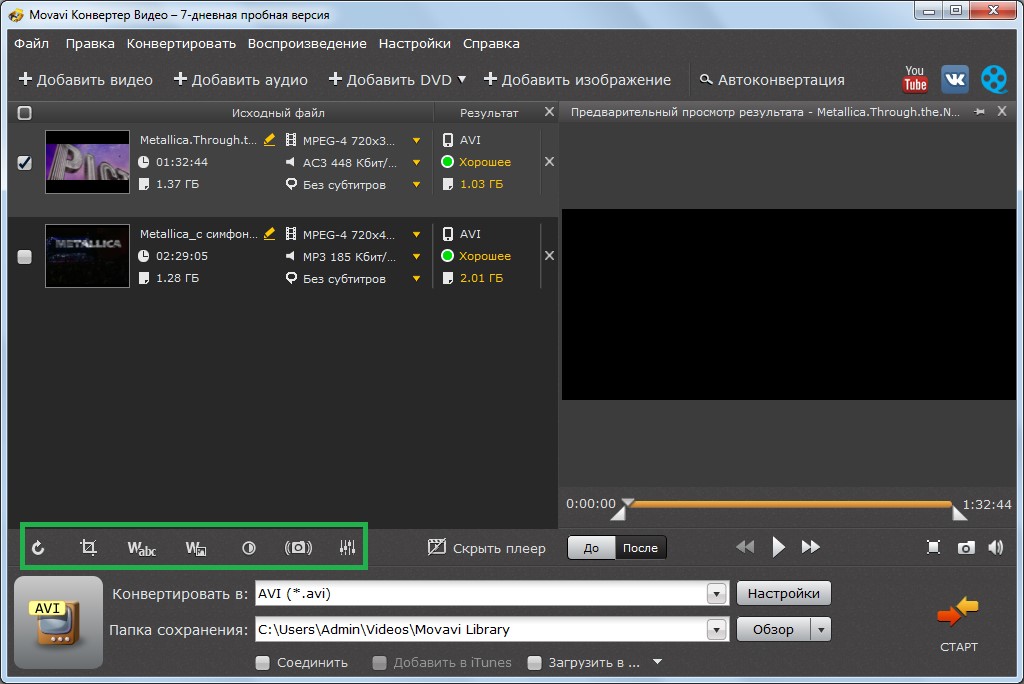
There you can rotate, display the video and perform other operations with it.
For example, to add an inscription, you need to do the following:
- Click on the video in the list of downloaded ones and select the “Inscription” command;
- After this, a new menu will open in which you can specify the transparency of the inscription, text color, outline color, font, and enter the inscription itself in the appropriate field;
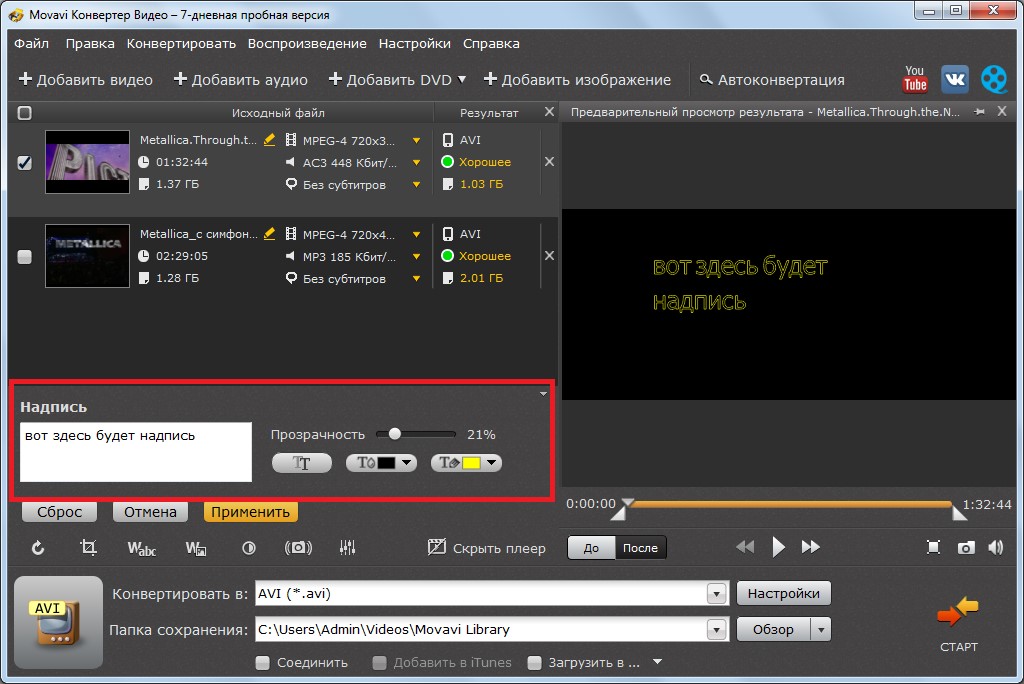
- Now, on the right side of the program window, under the video, you need to select the time frame when the caption will be present in the video (this is done by moving the start and end sliders);
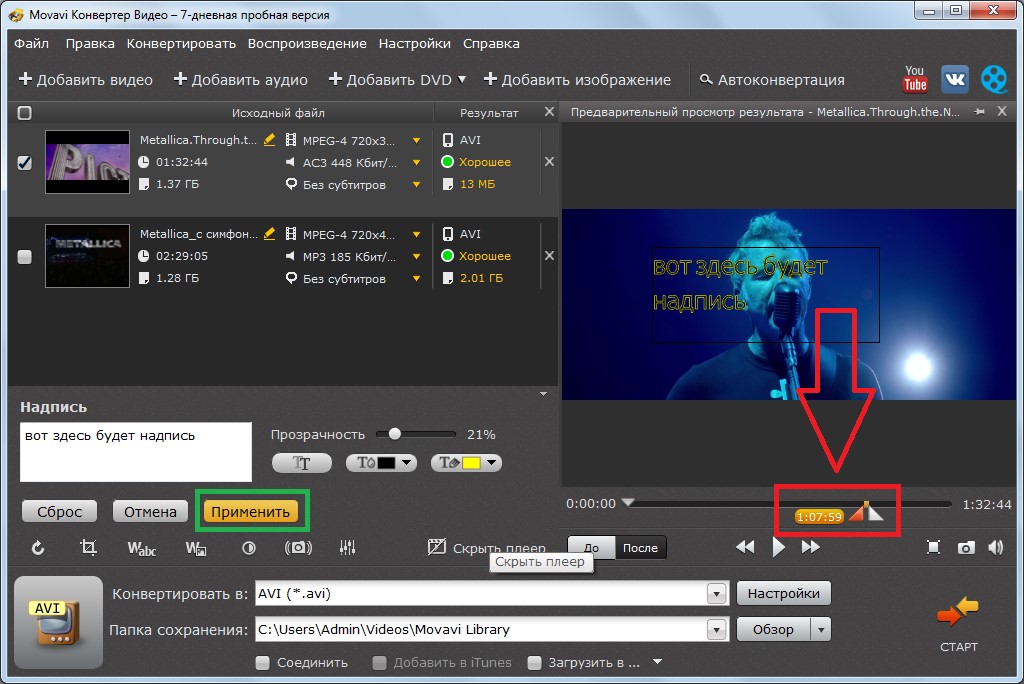
- Now all that remains is to click the “Apply” button, which is located under the text entry field and highlighted with a green frame in Figure No. 8.
As you can see, all operations are performed in this program very simply and quickly, but these are not all the advantages of the Movavi converter. Although it also has its drawbacks.
Bottom line
From all of the above, as well as from the comments and posts that can be found on the Internet about this program, the following advantages can be identified:
- Ease of performing all possible operations and at the same time very broad functionality of the program. With the Movavi video converter, you don't have to download a lot of additional programs for editing and converting videos, because this program has a combination of everything you need to perform these tasks.
- A large number of formats that the program accepts.
- Small price for such wide functionality.
- High conversion speed.
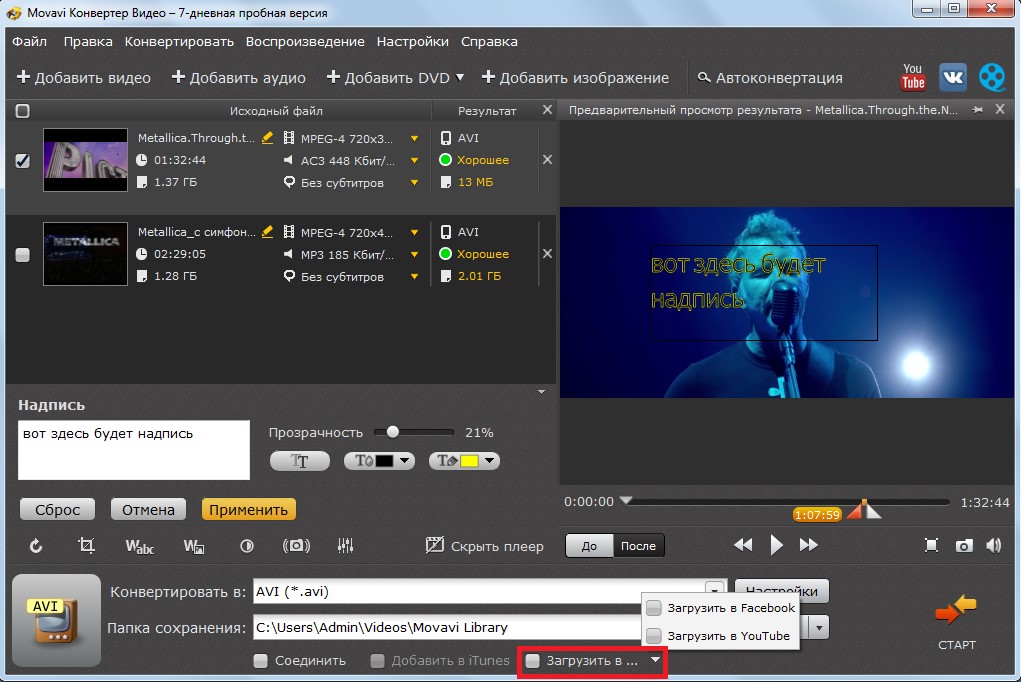
- A large number of other, additional functions. For example, you can send the finished video to your Facebook or YouTube page. To do this, you just need to click the “Download to...” button.
The disadvantages include a banner from the program when creating videos in the trial version.
Also, some users are faced with the fact that their program is not activated even with the key, and the support service does not want to say anything about this.
Although this happens extremely rarely.
Detailed instructions for using one of the versions of this converter are shown in the video below.