Movavi Video Converter 15
We have already talked about Movavi software several times, noting first of all its simplicity, accessibility and reliable operation. The time has come to renew acquaintance with the programs of this brand, evaluate progress and improvement, if any. To study, let's take the distribution kit of the new version of the popular converter - Movavi Video Converter 15.
Why a converter? Yes, very simple. The vast majority of users are not puzzled by such a concept as video editing. The maximum that an impatient owner of a video camera, camera or smartphone can do is to re-encode the captured videos for viewing on various devices or for publishing on the Internet. However, there is a second category of users who are engaged in editing and who require a fast, understandable and high-quality converter to “distill” the produced content from format to format.
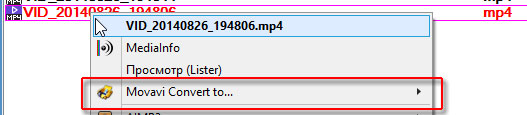
Video converters these days are like mushrooms after rain. Including free ones. All of these programs typically use the same set of libraries for coding, which are open source software. But libraries are libraries (the user may not even be aware of their existence), but the execution of the program can differ significantly. Thus, most free encoding programs are clearly designed for use by an advanced expert. How else, without special knowledge and practice, can you understand the dozens of proposed parameters? But there is a second option: programs with a simple, or, as they say, “intuitive” interface. In the case of Movavi, this clarity begins almost from the moment of installation, when the user is prompted to integrate the program into the Windows context menu.
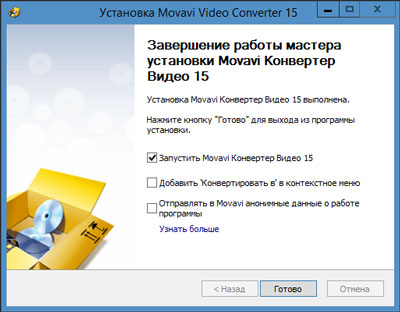
This function will allow you to launch the encoding program with literally two mouse clicks on the video file.
When getting acquainted with a new program, it would be a good idea to first study its settings. In order to have an initial idea of the application. In our case, we are dealing with a simple, accessible program. Consequently, its settings should not frighten an uninformed user. That's right - these parameters consist of only three tabs. In the first two tabs, you select the interface language, enable/disable tooltips, and adjust the behavior of the program after coding is completed - in general, nothing significant. But the third tab should be discussed separately. The three points available here are responsible for extremely important functions, namely, speeding up encoding. Below are screenshots showing the different states of the Acceleration tab. An experienced user will immediately understand what these flags mean.
But we will still describe these points in more detail. The first item, responsible for enabling/disabling SuperSpeed technology, activates the ability to simply repackage a video file. This operation differs from recoding in that video and audio streams are not affected during such an operation, are not transformed in any way, and therefore the quality remains original. All you have to do is change the container into which the stream compressed by one or another codec is packaged. For example, video encoded with the H.264 codec can be packaged in containers such as AVI (which is strictly not recommended), MTS, TS, MP4 or MKV. The choice of container depends entirely on the capabilities of the playing equipment or programs. For example, a player built into a TV can play MP4, but at the same time not see files with the MKV extension.
| Computer with Intel graphics | Computer with Nvidia graphics | Computer with AMD graphics |
|
|
|
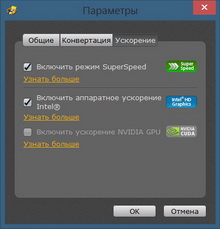

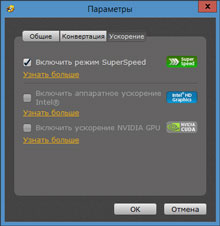
The second item regarding Intel hardware acceleration becomes active and is available for use only if the computer is equipped with an appropriate graphics accelerator. Such graphics processors are always integrated into the system (motherboard) boards of computers and laptops (the screenshot was taken on an Asus N56VB laptop that has such graphics). Finally, the third item, which activates the Nvidia CUDA architecture, works, as you might guess, only if you have an Nvidia video card.
Is it just one author who thinks that this list looks somehow incomplete? Of course, there is clearly no mention of AMD video cards here. Which, recently, can also accelerate the encoding of some video formats using the OpenCL framework. Despite this skill, the program in question does not support this architecture, which some users may be offended by. However, this topic is quite slippery, since it is associated with the “rawness” of the OpenCL software, and, probably, significant difficulties that arise in the implementation of its support.
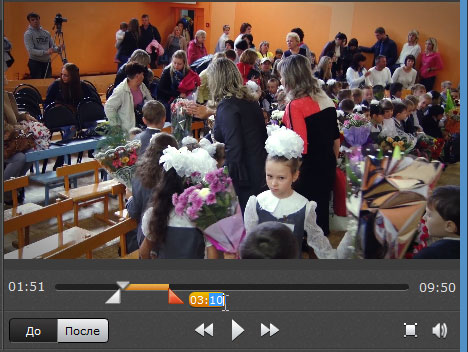
But let's move on to the program itself. The main program window is resizable and consists of several modules. A window containing a list of encoded content, a player window for viewing the selected file and determining the start/end points of the encoded segment, and, finally, at the bottom of the main window - the settings panel.
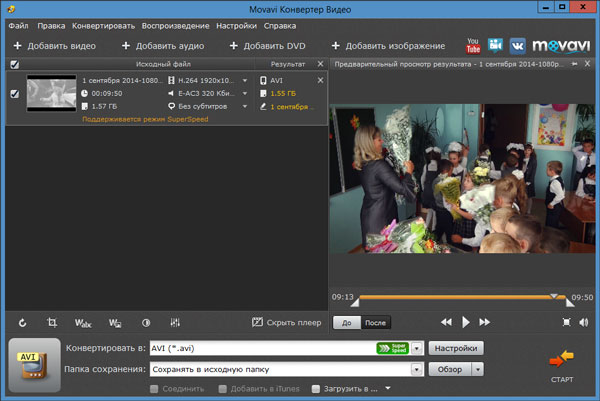
Let's first consider the window with a list of encoded content. Files that need to be converted or repackaged can be placed here by simply dragging and dropping. After a quick analysis of the video, the program displays information about the video and also suggests the format into which the video should be transformed. By default, it is proposed to re-encode the video to the last used format.
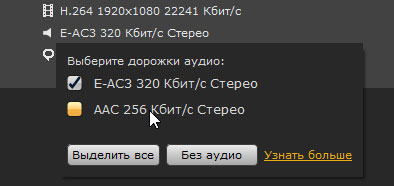
If the selected container supports the codec with which the source video is encoded, then an inscription about possible support for SuperSpeed mode appears in the file information block. This is the very possibility of quick repackaging from one container to another without recoding video and audio streams. In this case, it is possible to choose which streams should be packed into a new container. To display all the audio or caption streams available in the file, click on the corresponding line and then make a selection by checking the required streams.
It looks simple and smooth - until you click on the button to select the format in which to encode the video. There are so many codecs here, with so many presets, that an uninformed user will immediately become confused.

We can advise you one thing: don’t get lost. Today, in the vast majority of cases, everywhere and everywhere, with rare exceptions, only one codec is used - H.264.
This codec does not limit the bitrate, size or frame rate; this video is played by everyone modern household devices, and even more so software players. By choosing this codec, the user is unlikely to make a mistake, no matter how tricky - as it seems to him - the task before him may be. Exceptions? Of course, where would we be without them? These arise in cases where there are specific requirements for video. For example, “ancient” DVD players can only play discs that contain MPEG-2 video. More modern (but no less ancient) players also support playback of DivX and similar formats that are predecessors to H.264.
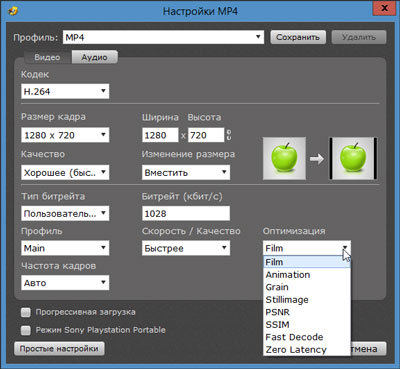
When choosing a format from an existing list of blanks, you should pay attention to the frame sizes that are included in this preset. However, it is not at all necessary to use only those blanks that are available in the program. There is nothing easier than changing any preset, or creating your own. For this purpose, the program has a Settings button.
Clicking it will open a window with additional video and audio parameters, where you can change all the key characteristics: codec, frame size, encoding quality, frame rate, and even select one of the special algorithms that optimize the encoded image for certain conditions.
You can't help but notice the video correction tools located at the bottom of the file list window. Such tools are usually missing from encoding programs, but this is not the case with Movavi.

As you can see, with the help of these simple tools you can rotate/flip the video (useful when processing “videos from a mobile phone”), change the aspect ratio of the frame by trimming the edges or filling them with black, add a text layer or picture (watermark), change the brightness , contrast, tone and saturation of the video, as well as change the volume level of the audio stream. What is typical is that operations related to cropping, inserting text or a logo can be performed with the mouse directly in the video viewing window. Why not a video editor, even a simple one?
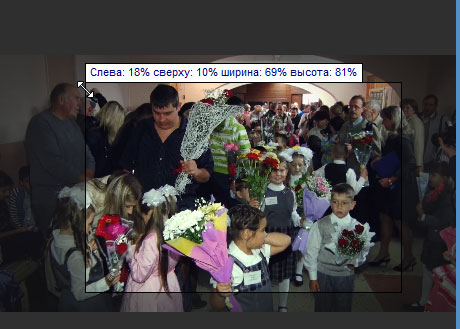
Finally, another important tool: the ability to select a segment for coding. In cases where you need to get a piece of video, and not the entire file, you should move these limiters to the required positions, indicating the beginning and end of the required section. If increased accuracy of position determination is required, then it would be a sin not to use the available pop-up field for entering digital values, where minutes and seconds are indicated.
By the way, the program is capable of not only cutting video files, but also stitching them! In order to combine two or more files into one, you should select them and check the “Connect” checkbox, which is located at the bottom of the program window. If the parameters of the videos being glued are the same, then it becomes possible to connect them without recoding. If the parameters are different (frame size and frequency, bitrate type, codec, etc.), then, of course, it will not be possible to glue them together without recoding.

But let's move on to the practical use of the application. What is usually the first thing that interests a user who installs a video converter? Well, of course, the speed of the program!
In our case, the application supports calculations using GPUs, simply a video card. Let's note an important feature: GPU acceleration is only possible when encoding in the AVC codec (H.264). These file types are marked with a special icon in the general list of formats:
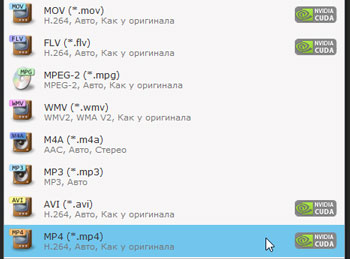
As you can see, the possibility of acceleration does not depend on the container in which the video is packaged: both architectures, Intel and Nvidia, are quite accessible when choosing MOV, FLV and other types of containers. This is because, as already mentioned, the same codec is used: AVC (H.264).
You can evaluate the speed of an application in different ways, including by eye. But this is not our method. We will encode the same file into AVC: on a laptop with an Intel GPU, and on a PC with an Nvidia GPU, measuring the encoding time. Moreover, we will perform this operation on the PC twice: with acceleration disabled, and then with acceleration enabled. Thus, we will obtain the relative magnitude of the acceleration and find out how much faster the graphics accelerator is compared to the central processor. And since the laptop has two graphics accelerators, we will carry out the encoding operation three times: on the central processor, using Intel graphics, and using Nvidia CUDA.
| PC Intel Core i7-870 @2.93 GHz + Nvidia GeForce GTX 780 | Laptop Intel Core i5-3230M @2.60 GHz + Intel HD Graphics 4000 + Nvidia GeForce GT 740M |
|||
| CPU | GPU Nvidia | CPU | GPU Intel | GPU Nvidia |
| 1:33 | 0:32 | 2:16 | 0:26 | 1:02 |
How can these results be interpreted? Nvidia CUDA gives a threefold reduction in encoding time on a PC, but on a laptop, the Nvidia video accelerator is only twice as fast as the CPU. It’s not surprising, “mobile” graphics have always been and are different from PC graphics. However, this statement applies to any other component of the system. But the fivefold acceleration of encoding when using an Intel graphics processor is probably too much. How can this be? Surely there is a solution somewhere. Perhaps this super-fast encoding comes at the expense of video quality loss? And we will check this assumption too!
To check, we will encode the same test file, which contains a large amount of movement, in two ways: on the central processor and with an Intel graphics accelerator. And then compare the resulting files.

| CPU | GPU Intel |
|
|


The conclusion is simple: our assumption was confirmed, there is a difference in quality. It is not so severe as to immediately and completely abandon GPU acceleration, but in cases where you want to preserve video quality as much as possible, you should either change the encoding settings, or indeed work only through the central processor.
The program under review impresses with its simplicity, accessibility, user-friendly interface and speed of operation. Any video file can be re-encoded with pre-prepared settings in just two clicks of the mouse. Yes, advanced “coders”, accustomed to the brutal command line, and distinguishing a P-frame from a B-frame, have nothing to do in this program - there are too few deep parameters here, and there are none at all that would allow them to manipulate quantization matrices or intervals key frames. But does the mass user need to know and apply the above parameters, as well as dozens of others not named? Rumors about a dramatic difference in quality when encoding using advanced parameters are greatly exaggerated. In most cases, it will be enough to temporarily abandon encoding using the graphics accelerator (if the picture must be top-notch), and move the quality slider to the maximum level.