How to disassemble iPad Air 2
Repairing an iPad Air 2 at home, as, in principle, any unprofessional intervention in an Apple device, will not lead to anything good. Repairing an iPhone, iPad or MacBook yourself is a sure way to end up with an expensive device restoration or even lose your pet altogether. But many would like to find out what is located inside the high-tech device, so we present to everyone a complete disassembly of the iPad Air 2 from the famous iFixit “tricksmiths”. Under no circumstances repeat what you see in this review, unless of course you want to go buy a new tablet and place yours under the leg of the sofa in the country.
The main problem when opening Apple's new ultra-thin tablets is assembly with glue. The familiar screw connections have been sacrificed for an ultra-thin design, making iPad Air 2 even more difficult to open. But there are no obstacles for an inquisitive mind, and several guitar picks and a household hair dryer solve this problem. To soften the glue connecting the two halves of the case, you need to carefully heat the upper part of the tablet (which contains the screen) and gradually pry up the front panel with picks. This must be done with extreme caution, since the iPad matrix is very sensitive to both high temperature and mechanical stress.
Some service centers manage to perform this jewelry procedure even with the help of a hair dryer, but in this case, “the slower you go, the further you will go,” so we’ll leave the professional equipment to the repair gurus.
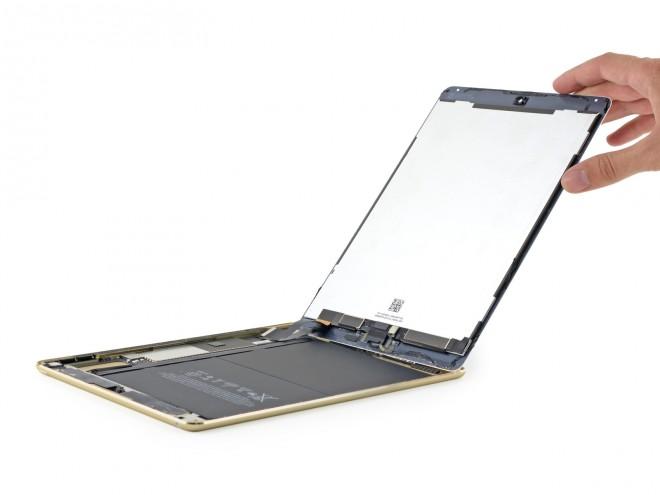
Once the tablet is opened, you can see that Apple has now arranged all the cables related to the display matrix, now organized on the side in the bottom corner.
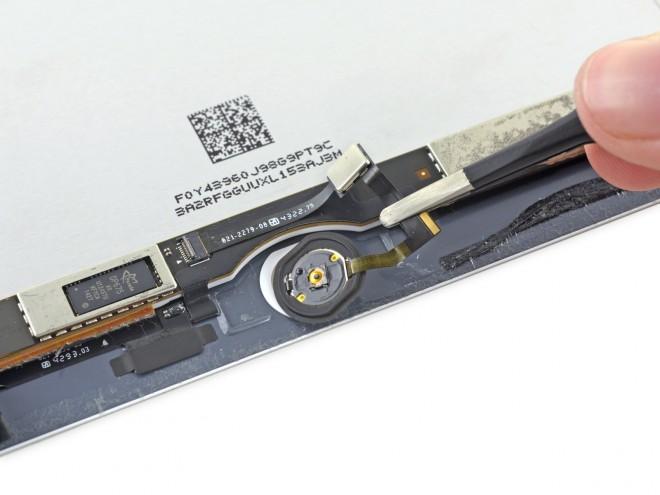 The photo shows that the sensor itself and its connection to the cable in the iPad Air 2 are very similar to how it is implemented in new generations of iPhone.
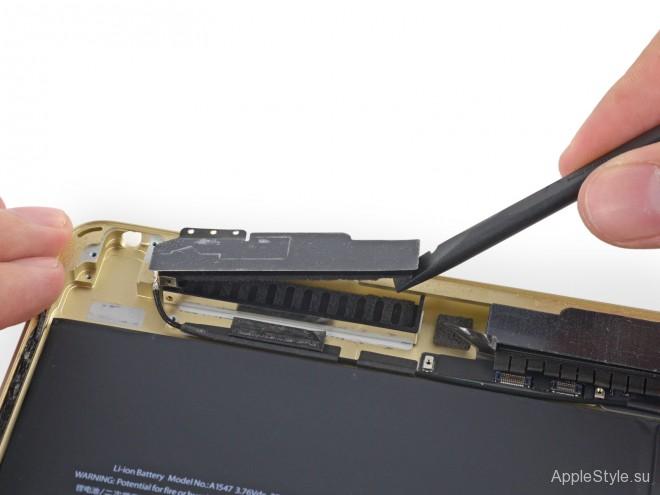
Now is the time to remove the tablet's miniature speakers. Unfortunately, their dismantling did not lift the veil of secrecy and did not reveal either the manufacturer or the exact characteristics - the speakers simply do not have any markings.
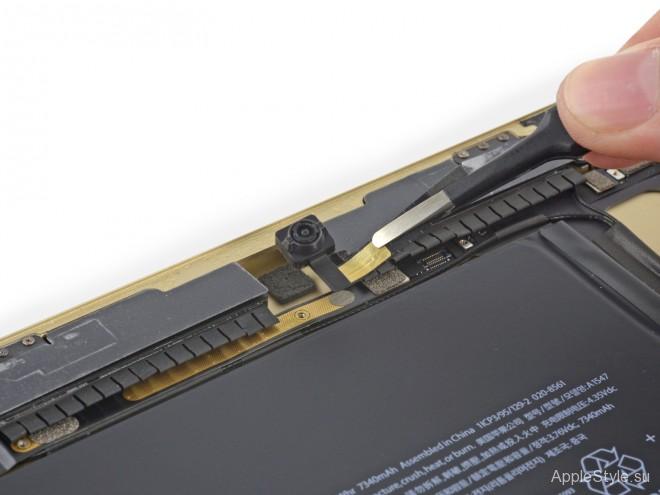
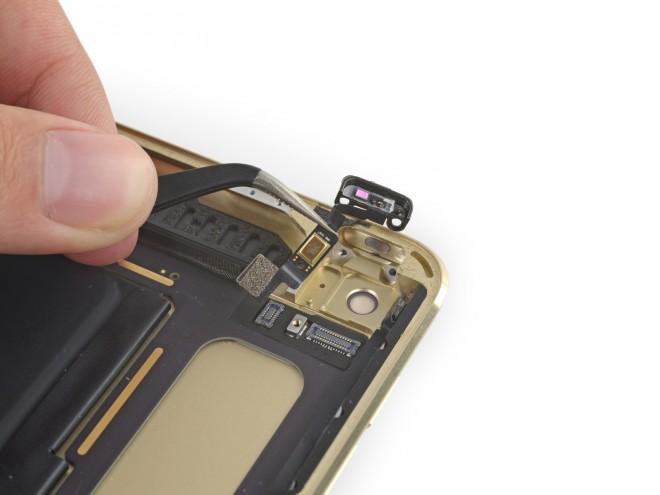
Carefully remove the FaceTime HD camera and the 8 MP camera with microphone.
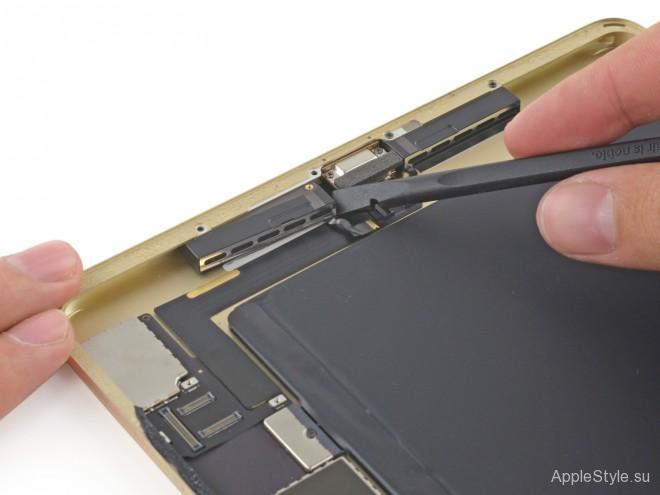
In a tablet with a Wi-Fi module, the antenna can be easily found at the top of the device.
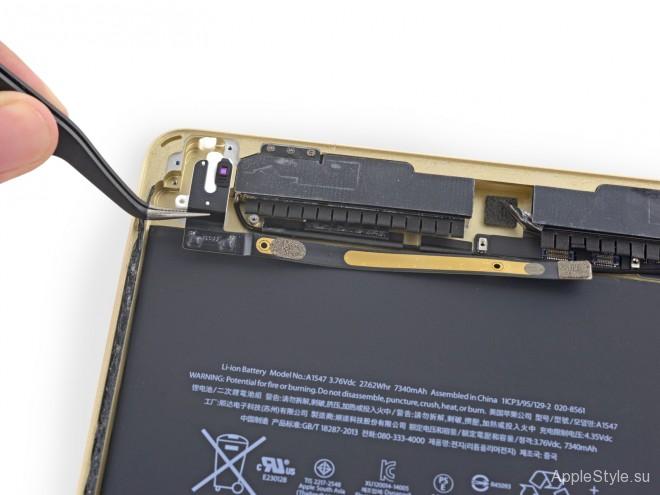
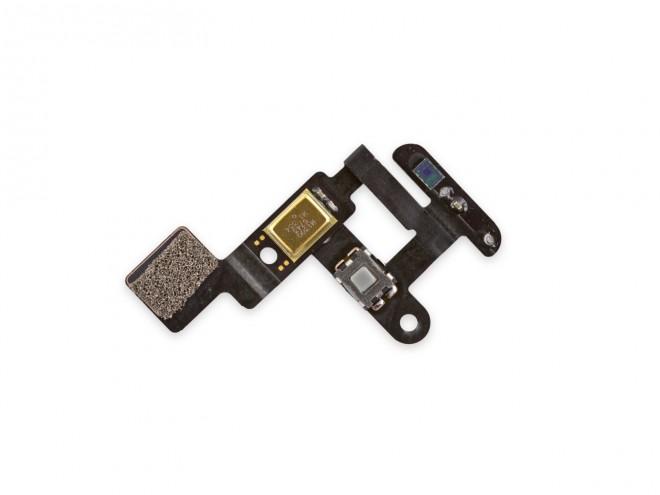
We take out the light sensor, one of the main microphones and the “Power” button.
Microphones
To secure the motherboard, the manufacturer again used glue, which, by the way, does not make repairing the iPad any more difficult. The problem is solved very simply: to separate the board from the device, you again need to arm yourself with a hairdryer and patience. As in the case of the matrix, you also need to be extremely careful here.
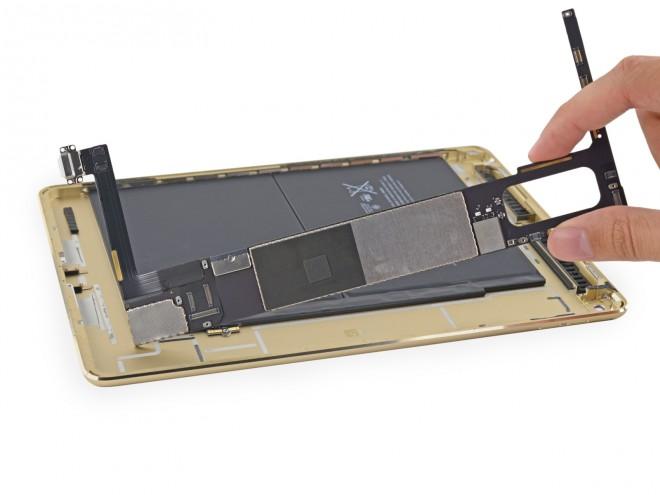 In the iPad Air 2, as in previous models, the Lightning connector is simply soldered to the board without any tricks.
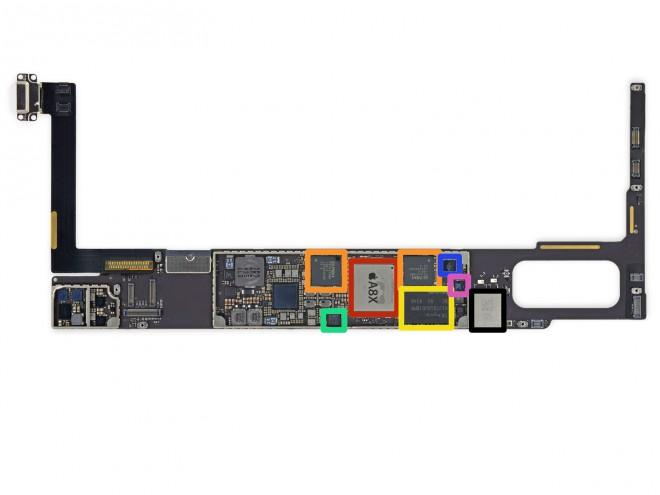
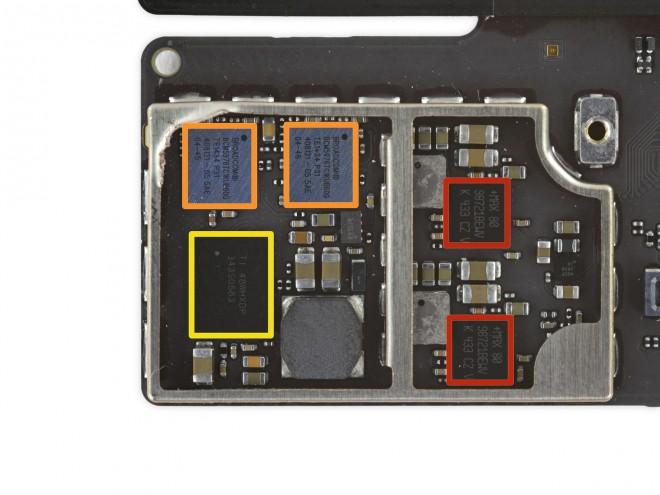 Now you can look at all the chips that are used in the tablet and read their markings.
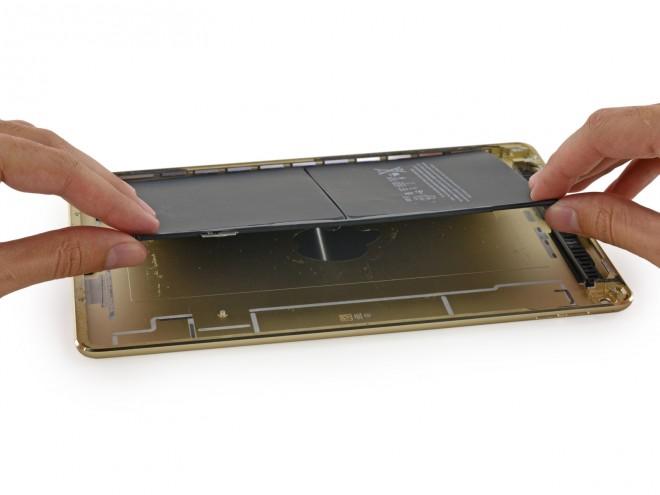 The battery, which is no longer glued to the device's logic board, can be easily removed from the device's case.
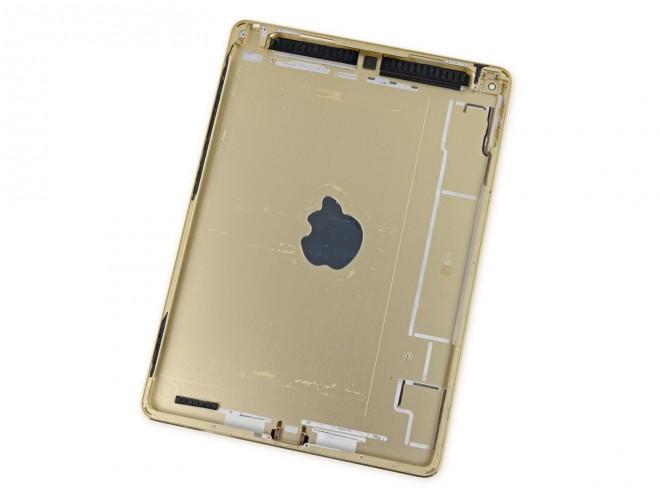 That's all - only the “skin” of the tablet remains on the table, on which a magnet designed to work with special Smart Covers is clearly visible.
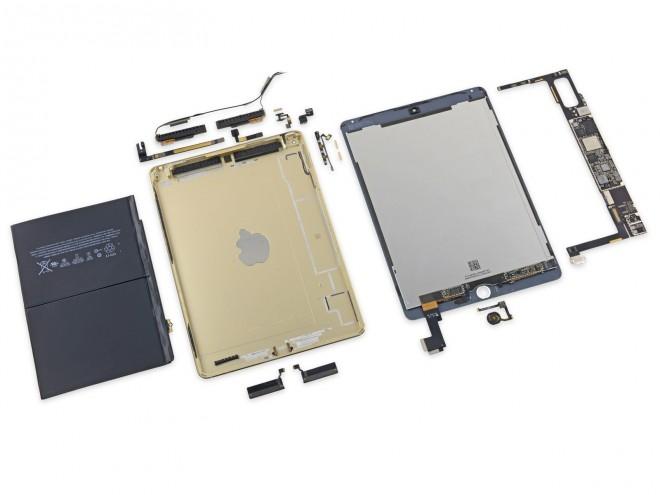 Overall, due to the presence of glued parts, the iPad Air 2 tablet does not give the impression of a device that is easily repairable. This is probably why iFixit experts gave it only a 2 out of 10 rating for maintainability. The situation is completely different with the new iPhone. iFixit specialists showed it and at the same time assessed it from a repair point of view.