Instructions for complete disassembly of iPhone 5s (photo + detailed description)
Instructions for complete disassembly of the iPhone 5s with photographs. Here you can learn how to remove the cover of this phone.
Step 1: Front Panel Assembly
Turn off your smartphone before starting work.
Remove the two 3.8mm screws next to the Lightning connector.
Step 2. Procedure for opening a smartphone with iSclack
The next two steps involve iSclack, a great tool for safely opening an iPhone 5S that we'd recommend to anyone doing more than one repair. If you are not using iSclack, skip to step four.
Fold the iSclack handle, revealing the tool's suction jaws.
Place the base of the mobile phone between the suction cups, in the polymer retainer.
The top suction cup should be located just above the Home button.
Release the handle to close the iSclack's jaw. Pay attention to the suction cups, press them properly over the entire surface to ensure reliable contact with the smartphone. 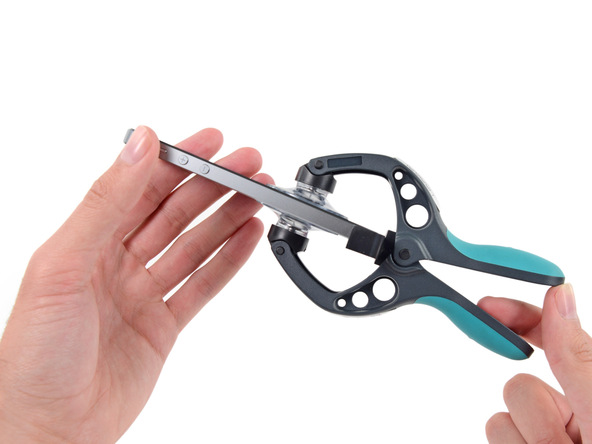
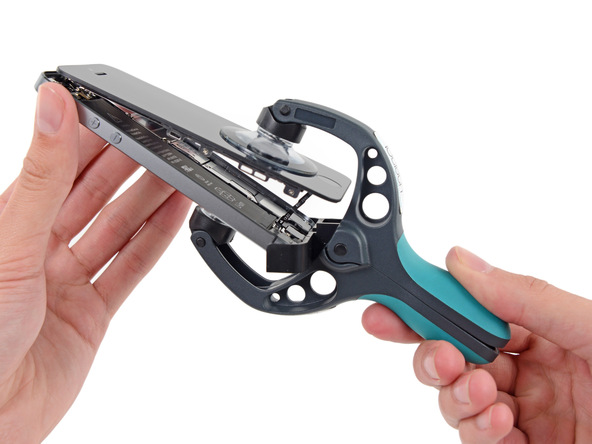
Step 3
Hold the smartphone and squeeze the iSclack handle again to spread the suction cups, opening the front panel from the case with them.
The iSclack tool is designed to safely open an iPhone; it is strong enough to open the panel, but not strong enough to damage the body of the smartphone.
Skip the next three steps and start from step 7. 
Step 4. Manual opening procedure
If you don't have an iSclack, use one suction cup to lift up the faceplate:
Place the suction cup on the screen just above the Home button and press down.
Make sure the suction cup is completely against the screen to ensure a tight seal. 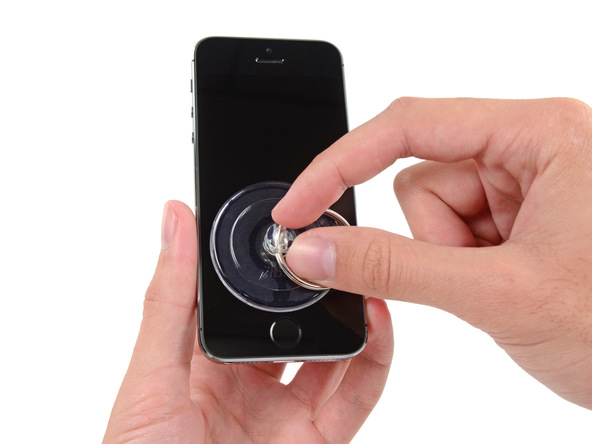
Step 5
The front panel of the smartphone is secured using clamps, and there are several ribbon cables connecting the panel to the rest of the smartphone. You must lift the panel enough to remove it from its clamps and also gain access to the cables. Work slowly and carefully to avoid damage.
Make sure the suction cup is securely attached to the front of the smartphone, next to the Home button.
While holding iPhone with one hand, lightly pull on the suction cup to lift the front panel slightly.
Using a plastic smartphone opening tool, gently press the body of the smartphone down while you pull on the suction cup.
It may take longer, but you must apply constant and constant effort. Opening the front of the 5S requires a lot more effort than most other smartphones. 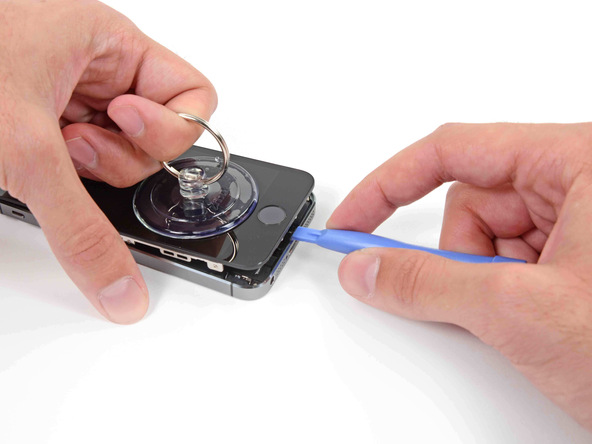
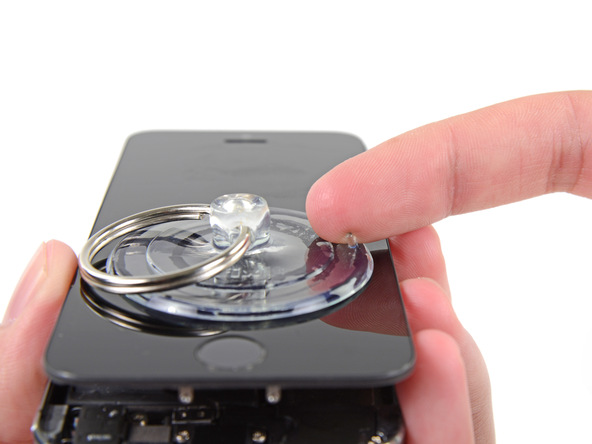
Step 6
Do not attempt to completely remove the front panel assembly as it is connected to the smartphone by multiple ribbon cables.
Use the plastic release to remove the suction cup, releasing pressure.
Remove the suction cup from the front panel display. 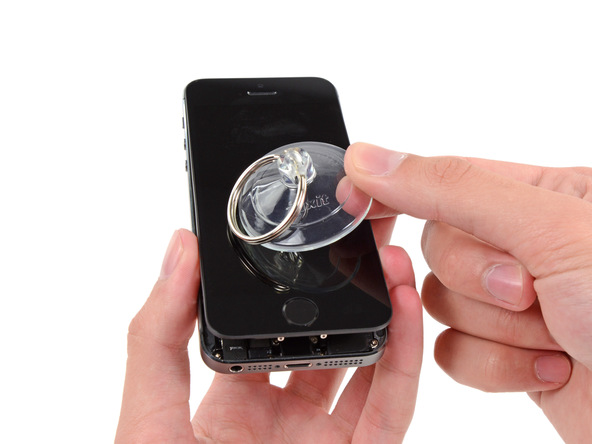
Step 7
Open the smartphone enough to reach the metal bracket that holds the Home button cable.
Do not open the panel too much, otherwise you risk damaging this cable or the connector into which it is connected. The cable should remain loose; if it becomes taut, you are lifting the panel too much.
Only the original Home button installation supports fingerprint scanner functions. If you damage the cable or button, reinstalling it will return the button to normal functionality, but the fingerprint scanner will not work.
Use the tip of a dielectric spudger to pry the bracket apart and remove it with tweezers. 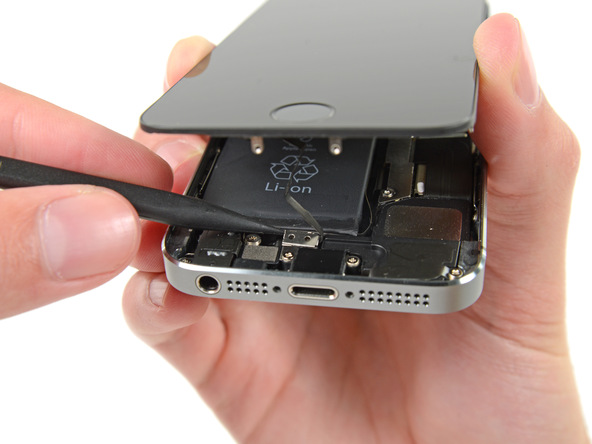
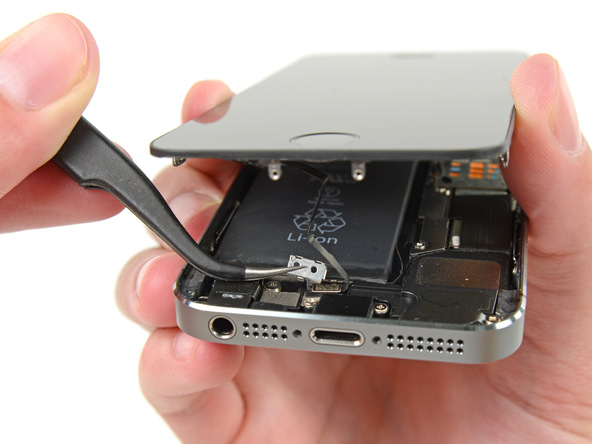
Step 8
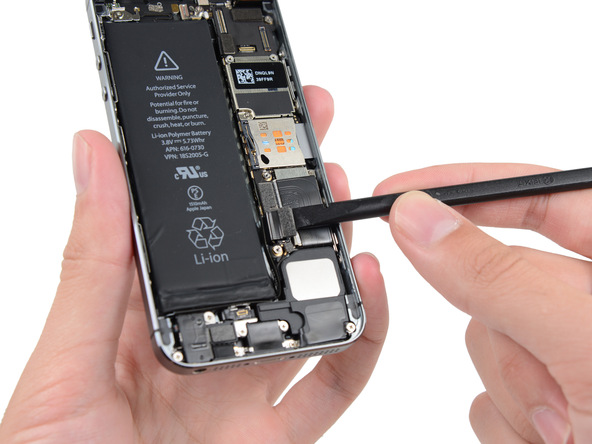
Use the tip of a dielectric spudger to pull the cable out of the connector.
Make sure you disconnect the cable and don't remove the entire socket along with it. The socket is separately attached with glue, so if you are not careful, you can pull it out along with the cable. 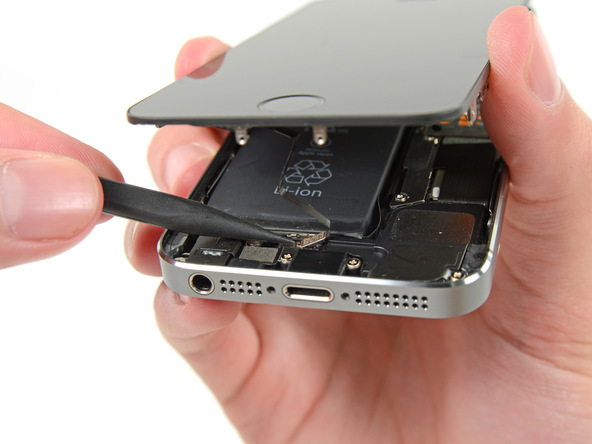
Step 9
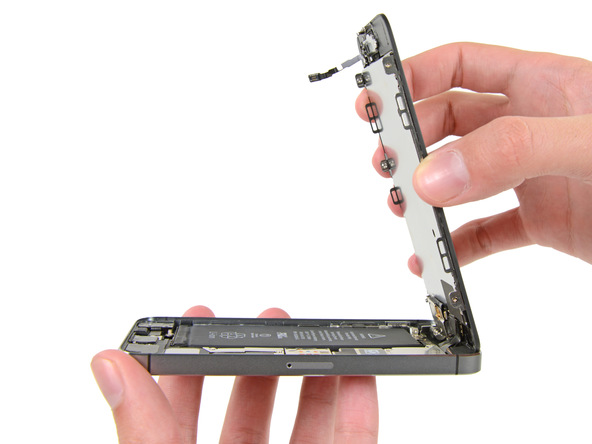
Once you've freed the connector, you can lift the smartphone's bezel away from the rest of the body, and you can even use it as a hinge.
In the next few steps, until you completely detach the front panel of the smartphone, keep it at a 90-degree angle relative to the body. 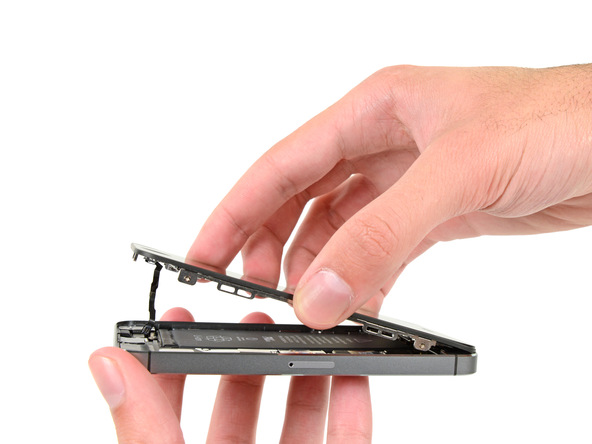
Step 10
Remove the following screws securing the cable bracket to the front of the smartphone:
— Two 1.7 mm Phillips screws
— One Phillips screw 1.2 mm
— One Phillips screw 1.3 mm
Please note that the 1.3mm screw is generally not magnetic to a magnetized screwdriver, so be careful not to lose it during removal. 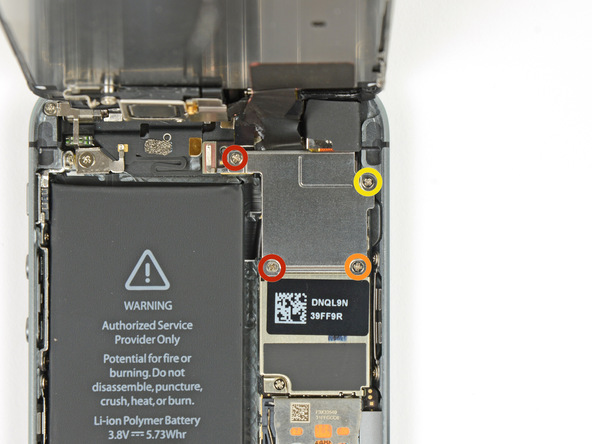
Step 11
Remove the left panel cable bracket. 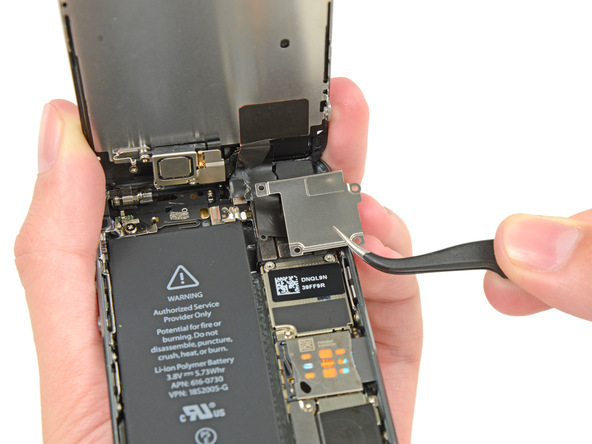
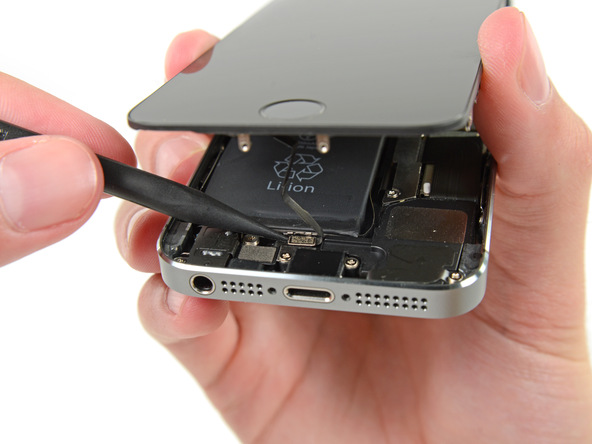
Step 12
Use the flat end of the dielectric spudger to disconnect the front camera and sensor cable. 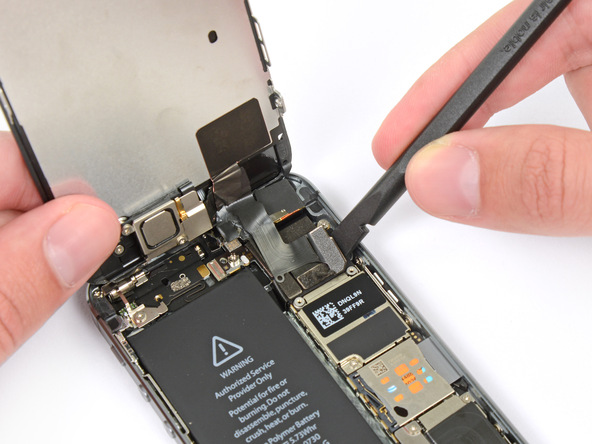
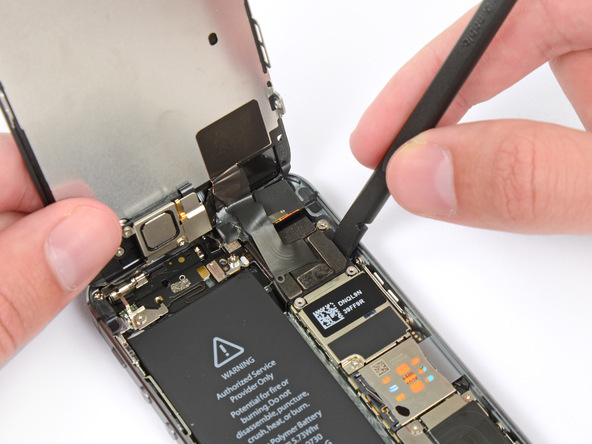
Step 13
And while you continue to hold the front of the iPhone 5S, disconnect the cable connector. 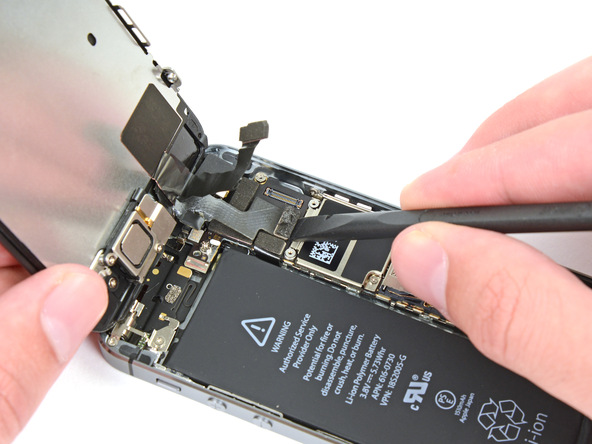
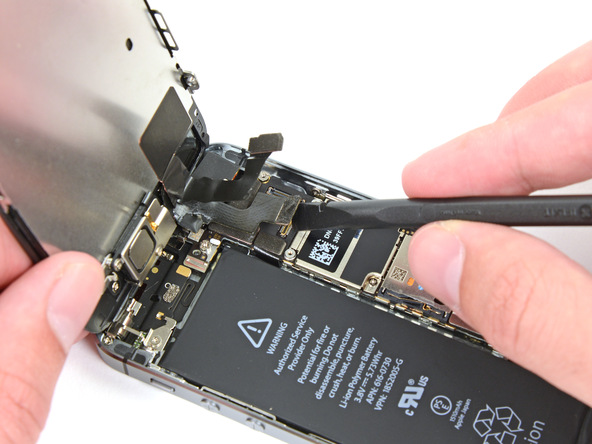
Step 14
Finally, disconnect the LCD cable connector.
During assembly of the smartphone, the LCD cable may fall out of the connector. This will result in white lines or a blank screen when you turn on your smartphone. If this happens, simply connect the cable and restart your smartphone again. The best way to restart your smartphone is to disconnect and reconnect the battery. 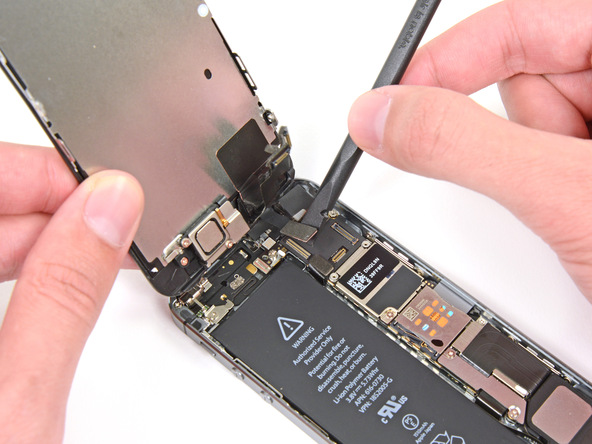
Step 15
Detach the front panel assembly from the smartphone body. 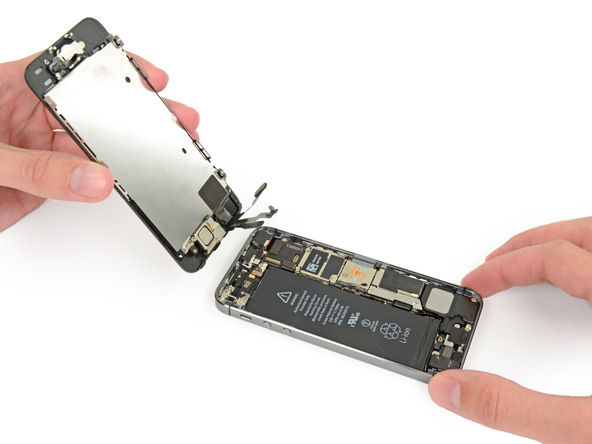
Step 16: Battery Cable Connector
Remove the two 1.6mm Phillips screws securing the battery connector with the metal bracket to the board. 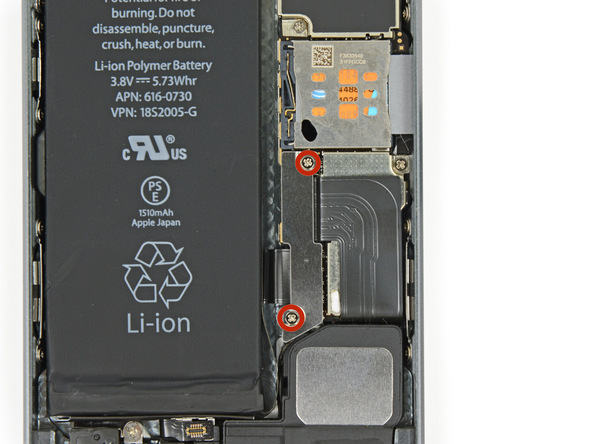
Step 17
Detach the metal battery bracket from the smartphone. 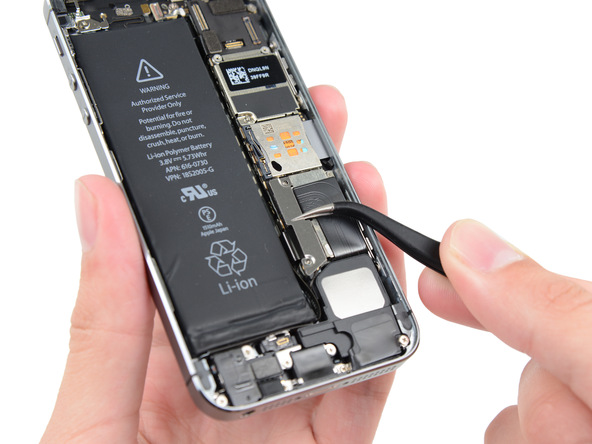
Step 18
Use the flat end of a dielectric spudger to carefully pry the battery connector up and out of its socket on the board.
Be very careful, you should only lift the battery connector, nothing more. If you overdo it, you could break the connector completely.