How to send a text document. We send the document by email – file attachment, link. How to attach a file to a letter and send it
E-mail is used not only for sending messages, but also for sending files (documents, photographs, etc.). They are called nested or attached.
An attached or attached file (attachment) is some kind of file from a computer that we add to a letter to send it via e-mail.
How to attach a file to a letter and send itLet's say I want a document that is on my computer to end up on my colleague's computer. I know his email address, which means I can write a letter from my mailbox and attach a file to it.
When a colleague logs into his email, he will see a new message containing a document. He can open it directly in mail or download it to his computer.
The file transfer technology is as follows:
1. I open my email and click on the button to write a letter.
| Yandex Mail: | Mail.ru: | Gmail.com: |
|
|
|
2. I type the address of the person to whom I want to send the file, and indicate the subject.
I don’t have to type the text, because I just need to send the file. But I usually print it: I say hello, I explain what exactly I am sending and why.

3. To attach a file, click on the special button at the top or bottom (above or below the part for entering text).
| Yandex Mail: | Mail.ru: | Gmail.com: |
|
|
|
4. A small window opens with files and folders on my computer. In it I should find what I want to send.

Let's say I need to send a document that is located on my computer in Local Drive D in the Agreements folder. So, I open the window Local disk D:

And I open the Agreements folder:

The files that are in this folder are shown. I find the one I want to send among them and double-click on it with the left mouse button.

The window disappears and my document appears above or below the attach button.
Immediately after this, my message with the attached document will go to the specified address. This is how the recipient will see it:
Notice the paperclip icon at the end. This way the email site shows that there is an attached file inside.
Having opened the letter, the recipient will see both the text and the document, which he can view or download to his computer.

You can add several files of any type to one letter. This can be photographs, documents, music and even video.
To do this, it is not at all necessary to send several letters - you can write one and add to it everything that you want to send. It happens like this: we write a letter, add one file to it, then, in the same way, another, a third, and so on.

But what if there are not one or two of them, but more than ten? Is it possible to add an entire folder rather than each file individually?
Unfortunately, you cannot send the folder by email. But it can be archived and attached to the letter.
This can be done directly in the window through which we add the file to be sent. Click right click mouse over the folder, select 7-Zip or WinRAR from the list and create an archive.

Then select the newly created archive there, that is, double-click on it with the left mouse button.

The archive containing the folder needed for forwarding is attached to the letter. All that remains is to send it.

If you plan to send more than three files in one email, then it is considered good practice to archive them.

For example, I want to send ten photos to a friend. You can, of course, send ten letters, adding a photo to each of them. But this is inconvenient neither for me nor, especially for him. So I decide to send one letter with all the photos attached.
In this case, it would be more correct to put them in a separate folder on the computer itself, then archive it and add the resulting archive when sending a letter.
As a result, one file will be sent, not ten. It will be easier for my friend to download it to his computer and unzip it than to look at (download) each photo separately.
Before sending photos via email, they should be compressed (reduced in size).

This is more than a rule of good manners. This is a necessity! But, unfortunately, many users are not even aware of this.
You will learn more about why this is needed and how to do it in the lesson “Photo compression”.
ExercisePublisher for Office 365 Excel 2019 Word 2019 PowerPoint 2019 Publisher 2019 Project Professional 2019 Excel 2016 Word 2016 PowerPoint 2016 Publisher 2016 Project Professional 2016 Excel 2013 Word 2013 PowerPoint 2013 Publisher 2013 Excel 2010 Word 2010 Publisher 2010 Project 2010 Excel 20 07 Word 2007 Publisher 2007 Project 2007 Project Online Desktop Client Project Professional 2013 Project Standard 2007 Project Standard 2010 Project Standard 2013 Project Standard 2016 Project Standard 2019 Less
If the version installed on your computer includes Microsoft Office Outlook is included and is the default for sending mail, you can send documents as attachments. Besides, Excel files, Publisher or Word can be sent directly in the body of the message.
If Outlook is not standard mail application, you will need to set it as such to use this feature. For more information, see Set Outlook as your default program for email, contacts, and calendar.
Open the file you want to send.
On the Quick Access Toolbar, click the Send to Recipient button to open the email message. The file will be placed in the body of the message.
Send .
Sending as an attachmentThe following instructions apply to Excel, PowerPoint, Project, Publisher, Visio, and Word.
Open the File tab.
Select the Send by email option, and then select one of the following parameters:
Send as attachment. An email message window opens with an attached copy of the file in its original format.
Send as PDF. An email message window will open with a copy of the PDF file attached.
Send as XPS. An email message window will open with a copy of the XPS file attached.
Note: In Project 2010 PDF formats and XPS are not available.
Specify recipient aliases, enter a subject and body of the message (if necessary), and click the Send button.
Below are the instructions for the OneNote 2010 app.
Open the File tab.
Click Submit and select one of the following options:
Send the page by email as an attachment. An email message window opens with a copy of the file in original format and a copy of the file in web page format attached.
Send as PDF. An email message window will open with a copy of the PDF file attached.
Specify recipient aliases, enter a subject and body of the message (if necessary), and click the Send button.
Send in the body of an emailIn Excel, Publisher, and Word, you can send files directly in the body of an email message (rather than as an attachment). To do this, you need to add the Send to Recipient command to the Quick Access Toolbar. For information about adding commands to the Quick Access Toolbar, see
Hello, friends! As you know, on VKontakte you can add videos and photos to the page, etc., then all your friends and guests of your account will see information that is interesting to you. But that's not all. You can send a photo or video to a person via a personal message. This is done using the “Attachments” button. This is where the “Documents” item that interests us is located.
And now we will figure out where to find documents on your VKontakte page, how to send them to another user, including a photo, how to add required file from your device, computer, laptop, phone or tablet, to your profile and how to remove unnecessary docks from a page or dialog.
But let's talk about everything in order. Since the article turned out to be informative, you can use the content to quickly jump to the information that interests you.
If you access your profile from a computer or laptop, then in order to view the dockets that are on your page, you need to select the appropriate item in the right side menu.
If the “Documents” line is not there, then move the cursor to any other item and click on the gear that appears.
The “Setting Menu Items” window will open. In it, on the “Basic” tab, opposite the “Documents” line, you need to check the box and click “Save”.

When you open the desired page, right side you will see a small menu. To quickly find required file, for example, you know its name, use the search.
Using the search, you can also see the docks of other users if they add them to their profile not as personal ones.

If you need to add a document to your VKontakte profile, then open the page with the entire list, as described above. Then click on the “Add...” button.

As you can see, there are restrictions on the size of the added file - no more than 200 MB. There are a lot of formats supported, so you can add a Word file to VK (*.doc, *.docx), e-book(*.pdf, *.fb2, *.djvu), file saved in Photoshop (*.psd) and much more.


Now you can change the name. You also need to indicate with a marker that this will be your “Personal Document”, that is, other users will not see it, or you can make it available through search.
For example, I add information about hot keys in Word. I’ll make the information open - you need to put a marker next to “Training document” and indicate the labels: hot keys, abstract, MS Word, Word. If any person searches for something like this through the search, he may see my work in the results.

The required dock will be added to your profile.

In order to send a file to another user, on your page in the right menu, select “Messages”. Then open a dialogue with the right person.
Below, to the left of the field for entering a message, there is an image of a paper clip - this is the “Attachments” button, click on it.


The “Attachment...” page will open. Below will be displayed full list files that are in your profile, you can select from it. To do this, move the cursor over the one you want and click opposite it on the “Attach” button that appears.
You can send the document from your computer or laptop. To do this, click “Upload a new file”, find it and attach it to the message. More on this below, using the example of sending a photo.
For example, I want to send Word. Since in the previous paragraph I uploaded it to my page, I simply select it from the proposed list. If you do not upload the file to your page, you can select it directly on your computer.

Wait a moment for it to load and click on the arrow to send the message.

If you need to send another user a photo document in VK from your computer, then open a dialogue with the desired person, click on the image of the paper clip and select “Document” from the list.

Now click "Upload New File".

Through the Explorer that opens, find a photo on your computer, select it and click “Open”.

The photo will be attached to the message, click on the arrow to send.

If you have a lot of old documents on the list that are no longer needed, then you can delete them from there.
On your profile page, in the left menu, select an item that we already know. Next, move the cursor over unnecessary files and click the cross next to them.

Click on the extension icon in the upper right corner of the browser. Then you need to select “My Page”, find the “Documents” section in the list that opens and click “Delete....”.

If you want to delete a specific file from a VKontakte dialogue, then go to the messages page and open a dialogue with the desired person. Then, in the correspondence, find the document to delete and click on the empty space next to it to highlight it, and click on the “Delete” button.

In order to view all the documents that you exchanged with the user, open a dialogue with him and click on the image of three horizontal dots to the right of the name. From the drop-down menu, select “Show attachments.”

The window that opens has four tabs, so you can quickly find what interests you.

To remove GIF images from documents on your VKontakte page, select “Documents” in the left menu.

iPhone firmware does not allow the user to work with Office documents. If you need to urgently make adjustments to Word and Excel files from your Apple gadget, you will have to download third party application from the AppStore.
Fortunately, similar programs in official store Apple - many. Using the example of one of them, we will demonstrate that processing an office document on an iPhone is actually a very simple procedure.
Thematic portals “with one voice” recommend downloading and installing Document 6 from Readdle – a file manager and browser, “two in one”. However, in fact, this program cannot be called convenient - it may be difficult for a beginner to understand it. Document 6 also has another drawback - this application places high demands on the operating system; needed iOS version above 9.0. It makes sense for the user to look for a worthy alternative to the program from Readdle.
Two applications claim this role: Polaris Office and “MyOffice Documents”. The Polaris Office program is better known, but it has a couple of serious disadvantages: firstly, the weight of the utility is very impressive - over 100 MB, and secondly, many of its functions are available to the user only after purchasing a subscription.
“MyOffice Documents” is a completely new domestic product that appeared in the AppStore only at the end of 2016.
This text editor boasts a modern, laconic design and extreme simplicity. Compared to Polaris Office program"MyOffice Documents" weighs less (about 80 MB) and offers more ways import of documents from outside. Using the Russian application as an example, we will study ways to process office documents on an iPhone.
How to download a Word document on iPhone?There are 3 ways to upload a Word or other document office program in the MyOffice Documents application - they are all equally effective.
How to reset Text Document to iPhone from computer?If you want to transfer a file from PC to iPhone, you should use email as an intermediary. Proceed like this:
Step 1 . Go to your mailbox from your PC and send a letter with an attached Word document to your own address.
Step 2. Open your mailbox on iPhone using the Safari browser or a special application. Users of the service from Rambler, for example, can resort to using the Rambler / Mail program, available in the AppStore.
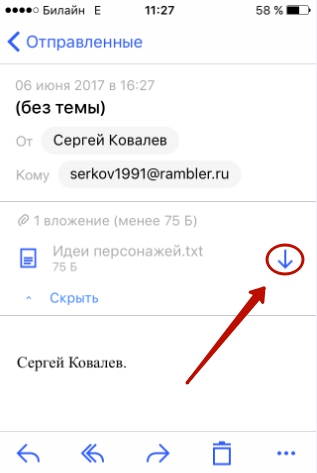
Step 3. Select one of the sections in your mailbox: “ Sent" or " Inbox" There you will find the letter that you sent from your PC. Open this letter.
Step 4. Download the attachment from the letter to your iPhone memory. In the Rambler / Mail application, you can do this by clicking on the downward arrow.
Step 6. From the options, select " Copy to Documents».
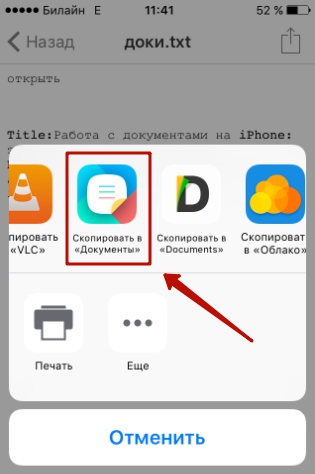
After this, the MyOffice Documents program will launch automatically. In chapter " On device» program you will find a downloaded text file.
How to transfer a document to iPhone via the cloud?The method of downloading a Word file via email cannot be called convenient. It’s much easier to upload a document to a text editor using one of the cloud services. You can use, for example, iCloud service Drive, to which every fan of Apple products has access.
Step 1 . Go to www.iCloud.com and log in.
Step 2. In the main menu, select the section " Pages».

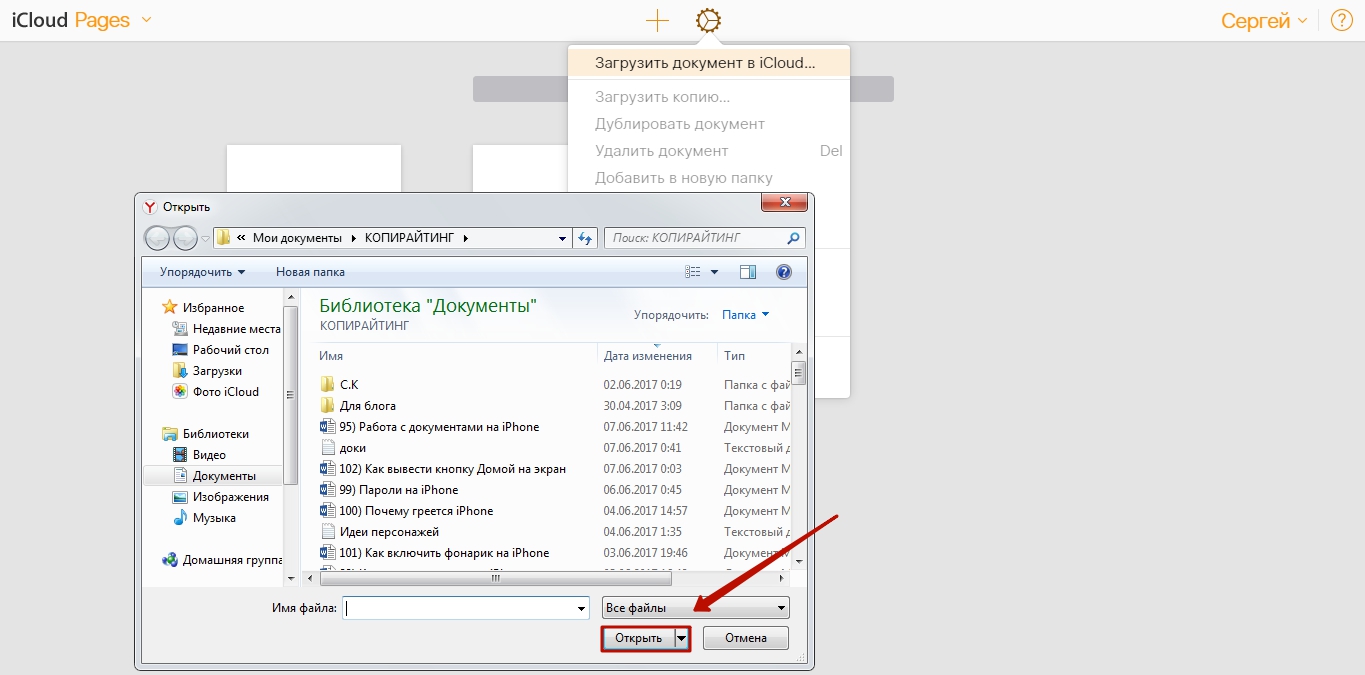
Step 3. Upload your documents to " Pages" Click on the gear and in the menu that appears, select the option “ Upload document to iCloud...».
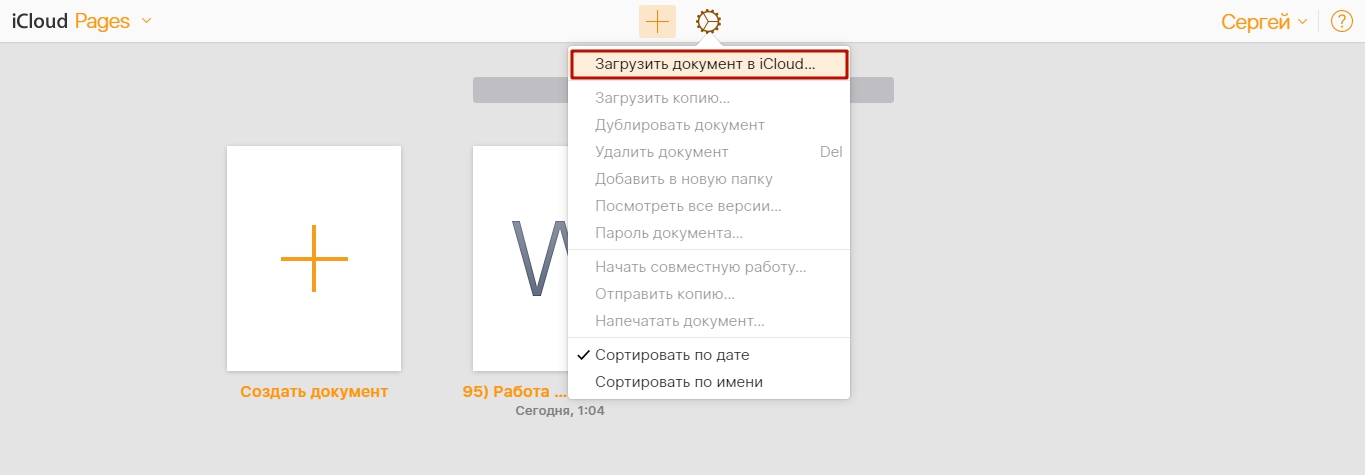
Then through " Conductor" Select the file you need on your PC and click " Open».
After this, you can close the iCloud tab on PC.
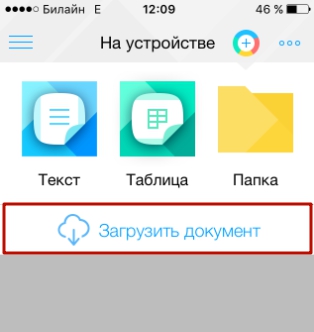
Step 4. Launch the MyOffice Documents application on your iPhone and click on the button with the “+” sign.

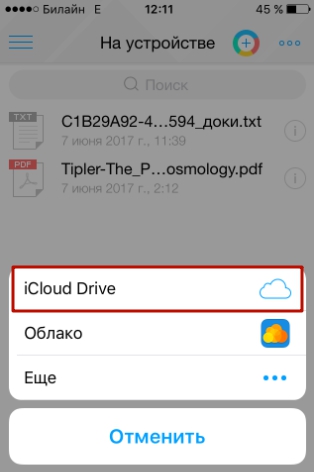
Step 5. Using the menu that appears, select from which cloud storage you want to import a file. We prefer the option " iCloud Drive ».
Step 6. Proceeding to the section " iCloud Drive", you will see the folder " Pages».
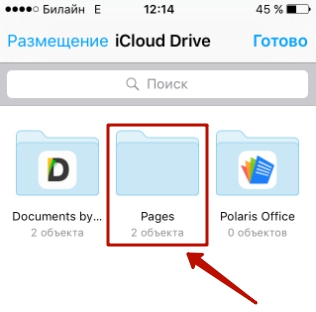
Open this folder - in it you will find the document that you downloaded from your computer.
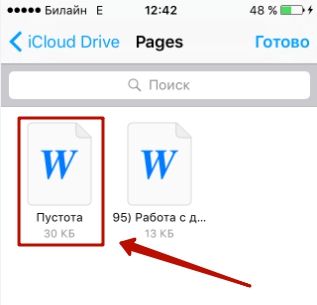
Click on the document and it will be loaded into the text editor.
How to download an Office document through the Safari browser?If you want to upload a document available on the Internet (for example, a book) to your iPhone’s memory, you can skip the PC altogether and download it directly from the gadget’s built-in browser. This is done like this:
Step 1 . Launch Safari and search the Internet for the file you want to download.
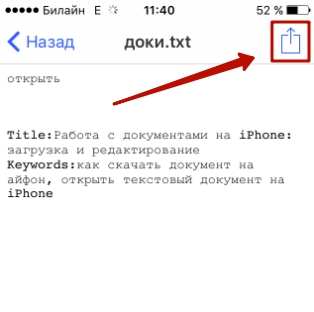
Step 2. Open this document in your browser and click on the gadget screen. A button will appear at the top of the screen Open in…»
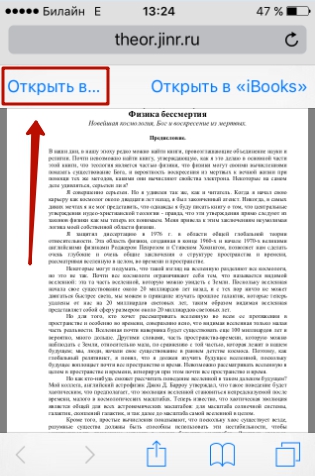
Click on it - this will bring up the menu.
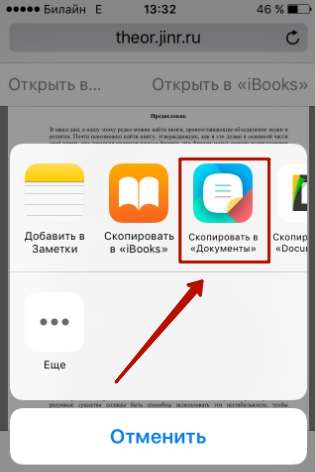
Step 3. From the menu, select the option " Copy to Documents».
Then click " Ready».
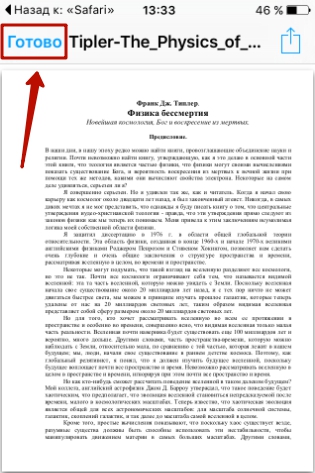
The downloaded book will be available in the " On device» applications « MyOffice Documents».
How to create a document on iPhone?Creating a new document on an Apple device is also possible - via third party program. In the MyOffice Documents application, a document is generated as follows:
Step 1 . Open the program and in the section " On device» Click on the plus icon.
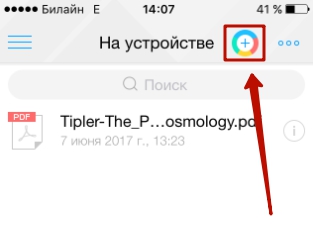
Step 2. Select what type of file you want to create. Options include a text file (Word), a table (Excel) and a folder.
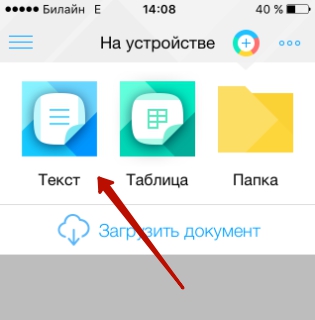
Let's assume that we need a text document - to generate it we need to select the option " Text" By clicking on “Text” you will find yourself in the editor:

All the main functions of desktop Word are also present in the editor of the MyOffice Documents application. In particular, the text editor allows you to:
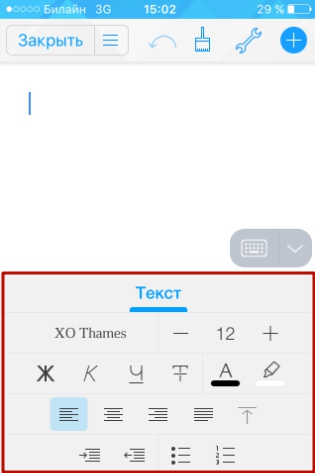
The listed functions are available in the menu " Text", which can be accessed by clicking on " Aa».

The MyOffice Documents application allows you not only to type text, but also to dictate it. You can activate the dictation mode by pressing the button with the image of a microphone.

This is really a very convenient feature. How clearly the program recognizes words was a pleasant surprise.
Step 3. Having finished writing the text, you can save the document in the MyOffice Documents program or send it by email, through the social network VKontakte, through the messengers What’s App, Viber and others - there are a lot of options. Click on the button with three horizontal stripes.
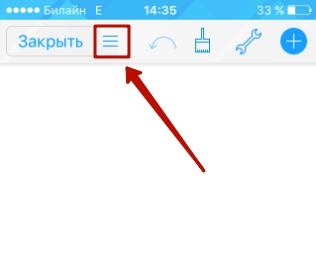
In the menu that appears, select " Export", if you expect to continue working on the text and do not want to output the document from the program yet, or the item " Send copy"if you want to use one of the listed withdrawal methods.

The MyOffice Documents program is capable of saving text files not only in .doc (Word) format, but also in .odt (Open Document Format) and .pdf. The latter format is especially important; It is recommended to convert files to .pdf before printing - so that due to mismatch between Word versions, signs, pictures and subheadings inside the text do not “move out”.
How to open a text document on iPhone and edit it?You can also open a file in .doc format for later editing on iPhone using the MyOffice Documents application. Upload the document using one of the methods described above and click on it in the “ On device" programs. The file will be opened in the editor.

Edit with mobile application not very convenient, because a significant part of the screen is occupied by the keyboard. To make more text visible, it is recommended to reduce the font size. You can do this quickly using a gesture called pinch – squeezing movement with two fingers at the same time. On the contrary, you can increase the size of the point by stretching it.
There are many ways to open a Word file for viewing without editing: in various ways- for example, in Safari browser or in the mail application.
ConclusionChoosing an application for working with text documents on the iPhone is a matter of taste. The most conservative users still prefer Documents from Readdle, although there are now more in the AppStore convenient programs. One of the store’s Russian new products, “MyOffice Documents,” turned out to be a very functional and easy-to-use editor. Users of this application can also create new Word documents/ Excel on your Apple devices, and edit existing ones.
How to send a document by email for dummies, three easy ways.
Do you want to know how to consistently earn money online from 500 rubles a day?
Download my free book
=>>
With development World Wide Web More ways to communicate between people at a distance have appeared. Now you can not only call someone without leaving your home, but also send an email.
At the same time, using e-mail, you can send letters with attachments in the form of various text documents, presentations, photographs, videos, and more. Of course the whole shipping process email with attachment is quite simple.
However, it is sometimes difficult for novice users to cope with this task without outside help. This article will take a closer look at sending emails with attachments.
How to send a document by emailDespite the many different services that provide the ability to send letters to in electronic format via the Internet (Yandex.Mail, Gmail, Mail.ru, Yahoo, Rambler and others), they all work according to the same algorithm.
Only attaching a file on such services may vary slightly. But in general, to send an email with an attachment you can stick to the following algorithm actions:
- First, you need to log into your account on the service and click on “Write” or another button provided by the mail service for writing a letter electronically.
- Then indicate in the “To” line email address addressee's mail.
- If necessary, you can specify the subject of your letter in the “Subject” field.
- Next, in addition to plain text, if you need to send a document or other file from a computer, you need to find the tool that is responsible for this on the service you use and click on it. For example, if you use Yandex.Mail, Gmail or Yahoo for these purposes, then you need to click on the icon in the form of a paper clip, and on Mail.ru and Rambler there is an “Attach file” button.
- After you find the document you want to send, click on it with the mouse to select it and click on the “Open” button.
- After uploading files to Post service, check that the letter is formatted correctly (to whom you are sending it and what exactly). If there are more documents than you need or you have chosen the wrong thing, then next to it, as a rule, a trash icon appears on the right side, clicking on which deletes it unnecessary file. To add a document, again click either on the paperclip or on “Attach file”.
- To send an email to the recipient, click on the “Send” button.
It is also worth noting that when using mobile version mailboxes, the algorithm of actions is similar to the extended one. That is, if you are on the road and the required document is on your phone or tablet, then if you have a mobile application, it can also be sent by e-mail.
In this case, also fill out all the required fields, and then click on the paperclip or “Attach file”, thus adding the document and sending. As you can see, everything is quite simple and convenient.
Send linkIf your document is stored on cloud services, such as Google Drive, Yandex Drive, and others, or you created a document in Google Doc, then you can send a link to the document.
To do this, open the document, click on access settings and copy the link, which can be sent in an email. If these are documents stored on Drive, then you can download them to your computer; if this is a document in Google Docs, then you can jointly edit it, make amendments, comments, and so on.
WordIf you use the Word program to create and edit documents, you can set up the email sending function once and then use it.
Instructions:

Pay attention to the top panel, namely the tab - mailings. A new icon should appear there, with the name you gave it.

Now, after creating or editing a document, click on this icon. You only need to indicate the recipient's email, and the document will be sent to the specified address.

I showed you three ways to send a document by email, choose the one that is most convenient for you. Once you send a letter, you will understand that there is nothing complicated in this process.
The main thing to understand is that you do not send the paper document, it remains with you. you send it electronic copy, and the recipient will print it himself if necessary.
But to send the paper original of any document, you should use our regular mail and send the document by registered mail.
Useful articles:
P.S. I am attaching a screenshot of my earnings in affiliate programs. And I remind you that anyone can earn money this way, even a beginner! The main thing is to do it correctly, which means learning from those who are already making money, that is, from Internet business professionals.

Get a list of proven Affiliate Programs in 2018 that pay money! 
Download the checklist and valuable bonuses for free
=>> “The best affiliate programs of 2018”